
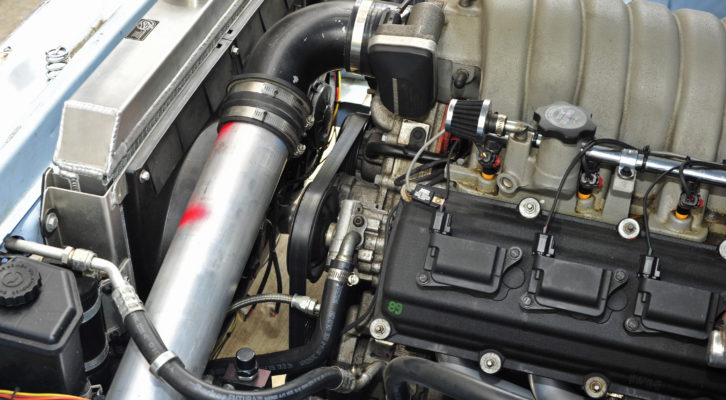
I’d been meaning to get to this project since “finishing” the car in 2013. It was time to get off my ass and add a sweet cold air induction setup to the Duster. The old air filter was mounted directly to the throttle body, near the hood and nearly touching the radiator. This seemed to me to be a pretty hot, nasty place from which to draw air into the Hemi. The plan was to move the filter out of the engine compartment altogether and mount inside the front left fender.
Look at that poor air filter. Perched up there by a hot radiator and clamped onto a hot engine. It’s a wonder the car runs at all.
Lucky for me, I had some random parts from past cars and projects that I could put to use for this project, including an elbow pipe, some couplers and clamps, and a small Spectre filter which had never been used. One of the couplers was actually a plumbing piece that I bought at Home Depot. It would do for now but be replaced with something less ugly.
I would need to purchase a piece of straight tubing so I headed to Metal By The Foot on Truman Road here in Kansas City. I had planned to buy a steel tube that was 3.5″ and around 24″ in length. They didn’t have 3.5″ steel tubing but they did have aluminum ones. For some reason I asked for a 36″ length of the aluminum tube even though 24″ would have been plenty. I kind of regretted this when it came time to pay for the tube. Turns out, 1/4″ thick aluminum tubing is expensive.
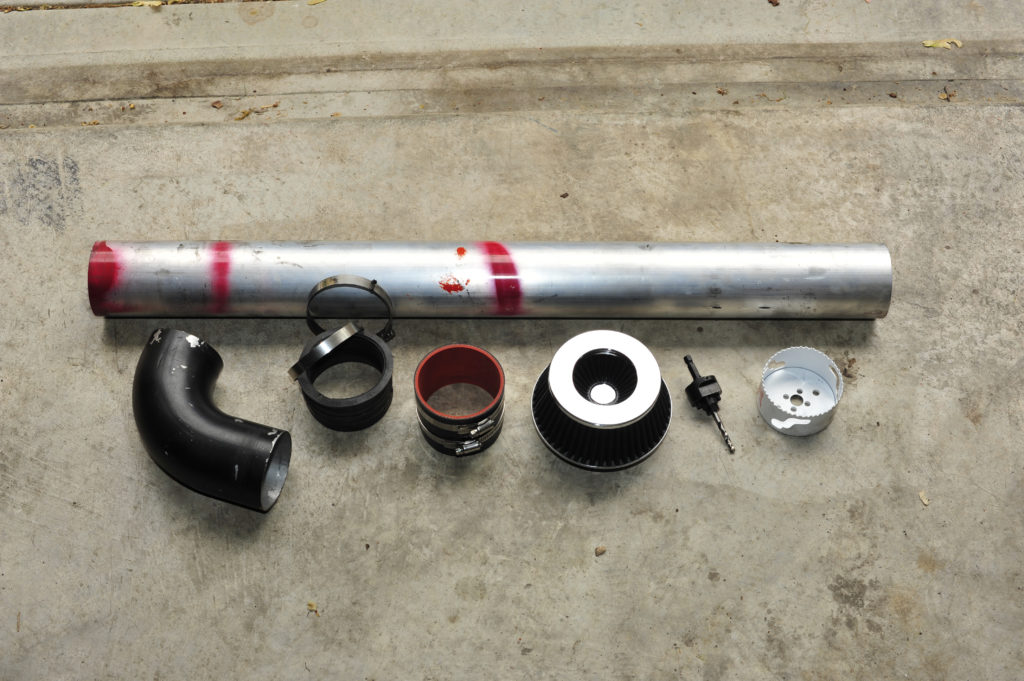
What you see here is are the elements needed to create a custom cold air induction setup. The fatter, uglier rubber thing is the plumbing piece. It’ll do for now.
With all the parts in hand it was time to get started!
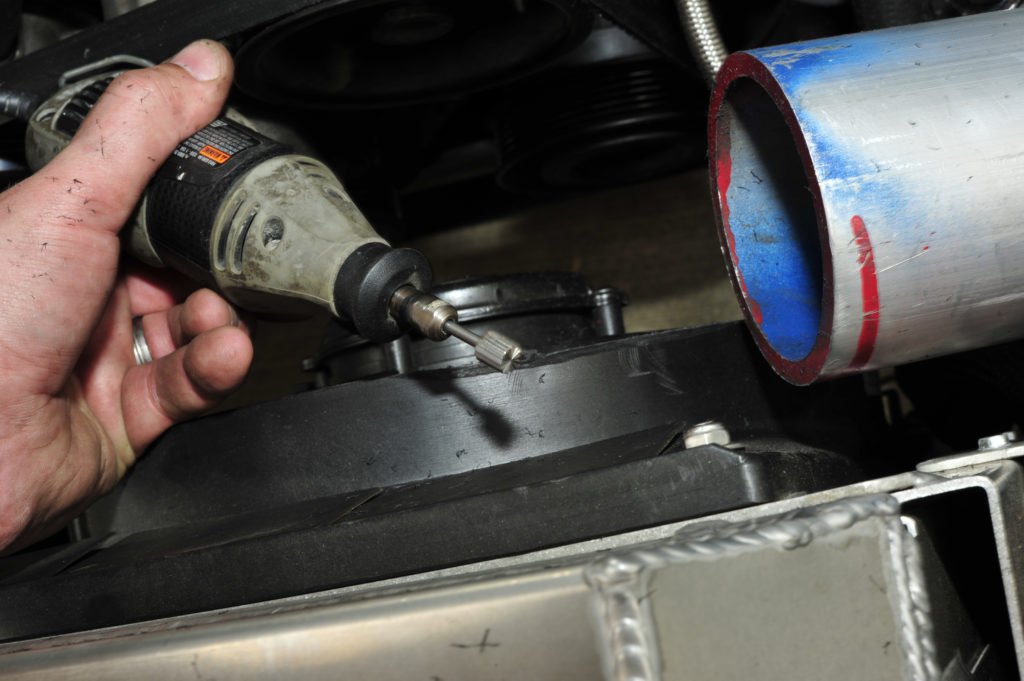
Obviously, I needed to cut a hole in the inner fender so I could gain access to all the sweet cool air whooshing around inside the fender. This would be achieved by using a regular old cordless drill outfitted with a 3 5/8″ hole cutter. I figured that would give me enough wiggle room to work with. I chose to place the hole as far forward as possible in an attempt to get the filter as far from the tire as possible.
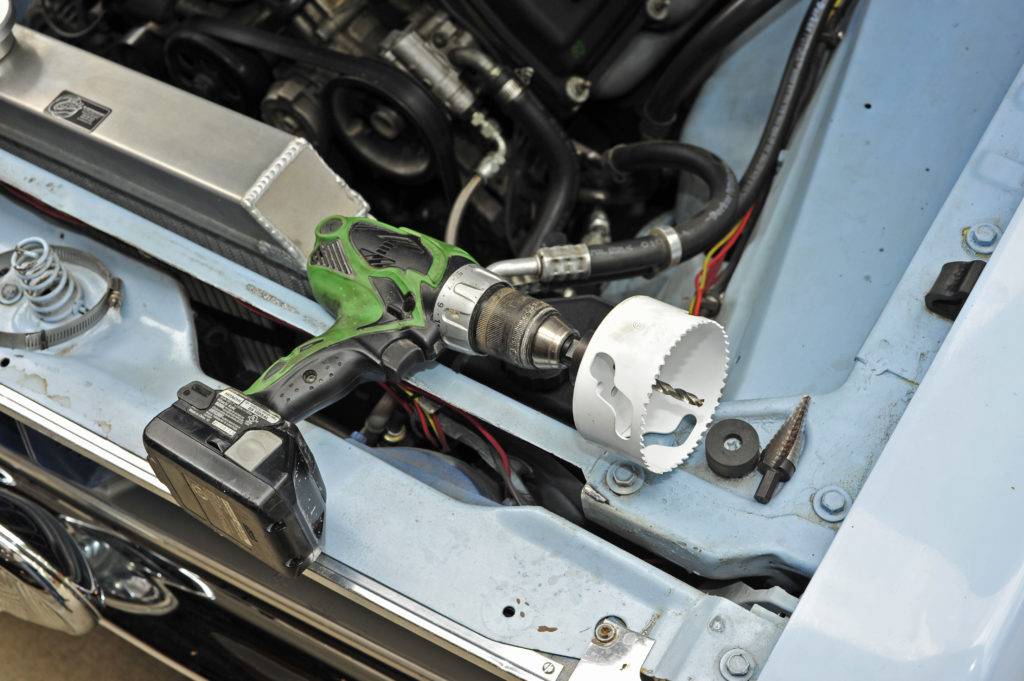
I didn’t have the proper hole cutter sitting around so I had to buy one. Damn thing was like $25.
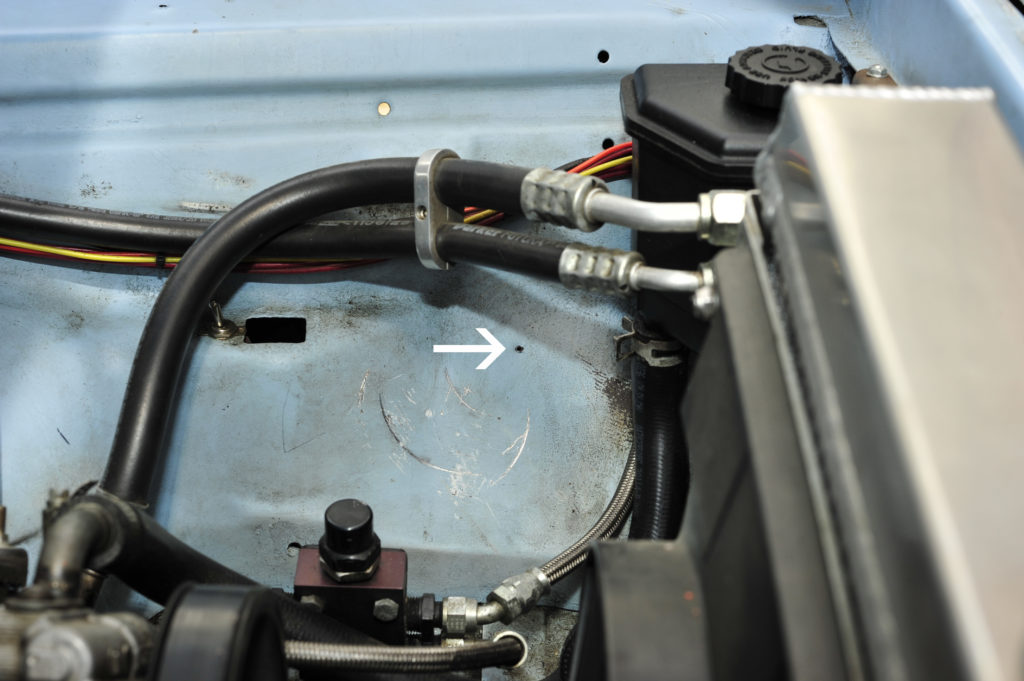
That little white arrow is pointing at the hole I drilled as a guide for creating the gaping hole in the engine compartment of the Duster. This better work.
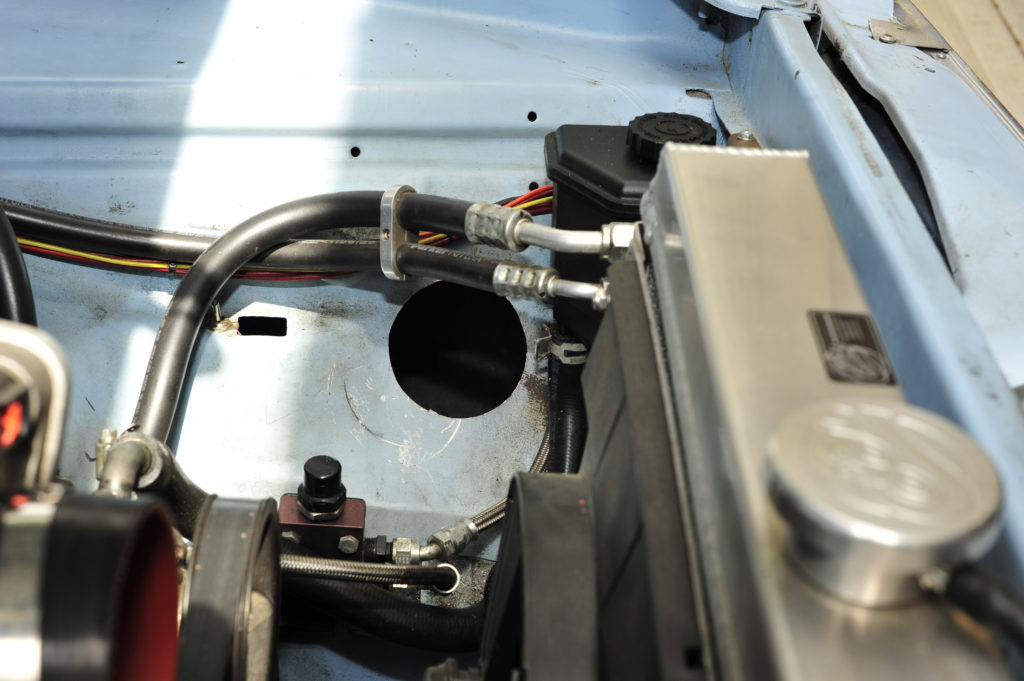
And there you have it. A hole.
Once the hole was made I could start assembling my humble collection of parts into a functioning cold air intake. Everything was looking good but I would have to cut down the aluminum tube to a length of 20″ inches. I had no suitable way to make this cut so I called on my friend Gary for assistance. Luckily, he was home and he told me to come on over. He only lives a couple blocks away so I grabbed the tubing and headed his way. Gary’s band saw would fit the bill nicely so he secured the tube and started cutting. Soon I’d be walking back home with TWO tubes!
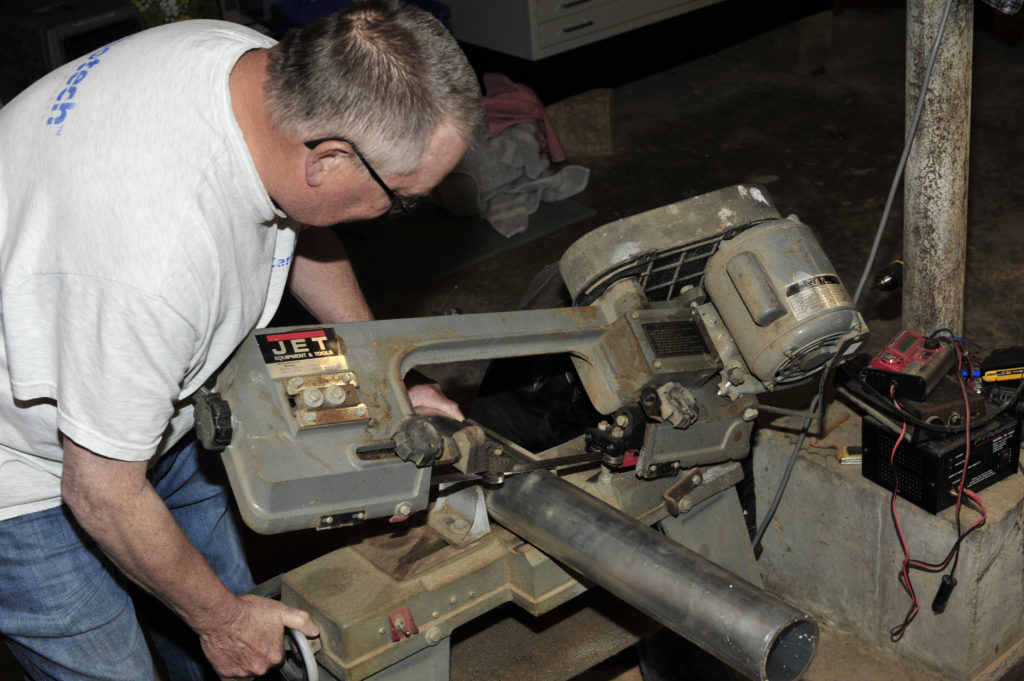
There’s Gary manning the band saw. It served its purpose ably, but slowly.
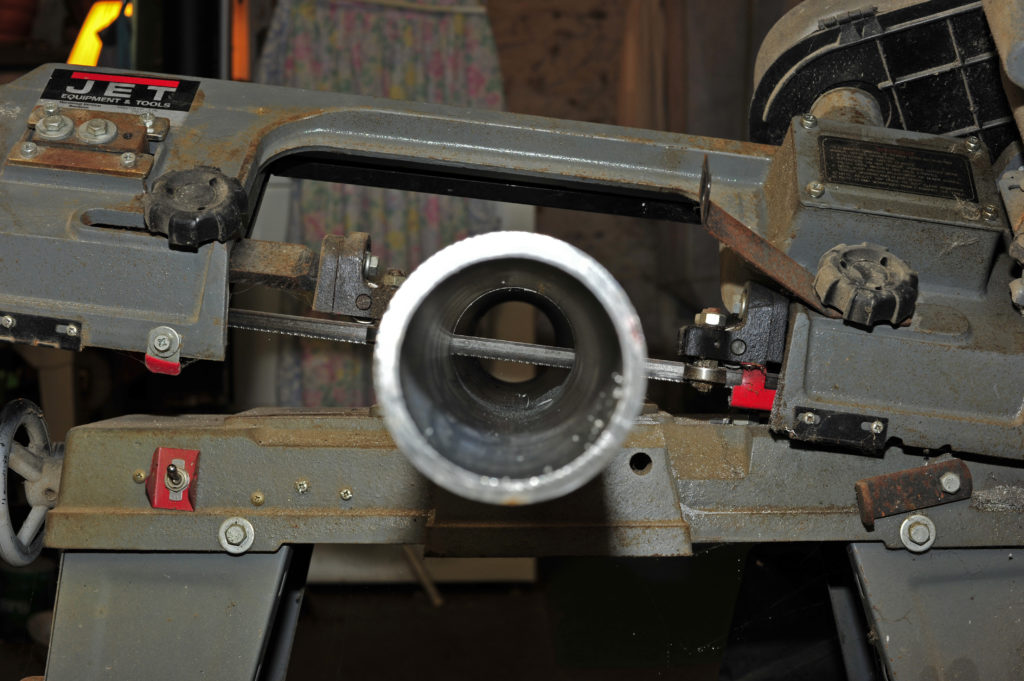
I didn’t mind that the band saw was slow because it enabled me to get this art shot!
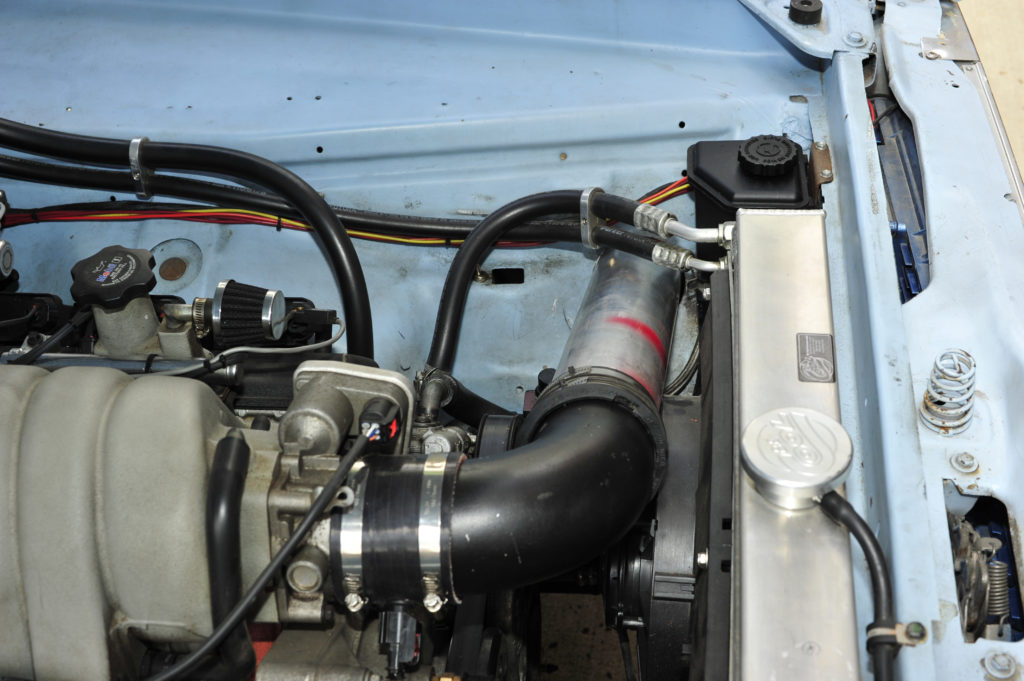
At this point, there really wasn’t that much to do to install the setup I envisioned. As I progressed, however, it became clear that I had run into a problem. By cutting the hole in the inner fender as far forward as possible, the tube Didn’t clear the fan shroud. I was faced with two options. Option one involved denting the tube with a hammer. This seemed pretty barbaric and I didn’t want to deform my nice tube in such a violent way. That left option two, which was to trim the fan shroud in order to create the necessary clearance. This time I had the right tool for the job in a handy dandy Dremel Tool.
I was pretty careful with the carving of the fan shroud. I didn’t want to screw anything up so I took my time.
With the fan shroud trimmed it was time to put everything back together for good. I went with the old sliced vacuum hose trick to act as welting around the hole in the inner fender. The tube was a tight fit but not too tight. Everything has come together nicely. The most time consuming part of this project thus far has been working on the fan shroud. Without that setback, I’d only have about an hour’s worth of actual labor in this project. As it stands, I’m about two hours in. Still not too bad. And now I have a kick ass cold air induction system feeding my 6.1 liter power plant!
Be sure to take note of the Home Depot rubber plumbing piece. It was once part of an induction setup on my 1995 Impala SS.
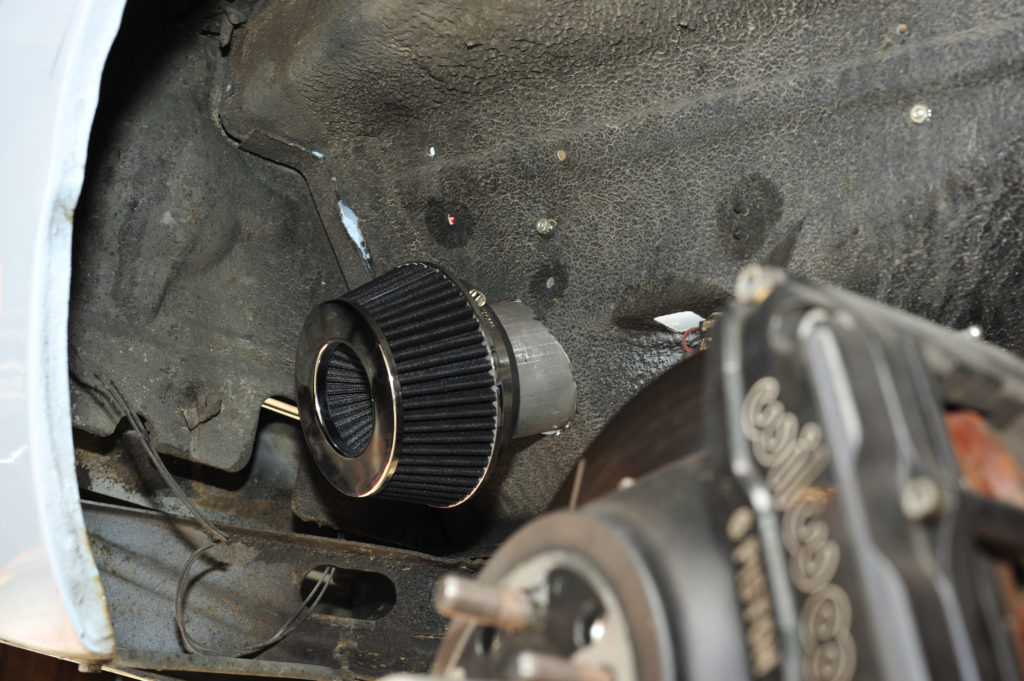
And there it is. A happy little air filter all set to help feed air that will be considerably cooler than that in the sweltering engine compartment.
I know what you’re thinking. You’re all like “what happens when it rains?” and “Good luck if you hit some standing water, moron, you’ll bend a rod”. These are good observations. I had a plan. It involved a splash shield and a water resistant sock placed over the air filter. I sourced a Spectre piece at Summit Racing that is touted as a heat shield. I thought it would meet my needs, as well. Summit also had the sock I needed. Oh! They also had the new coupling to replace the Home Depot plumbing department thing.
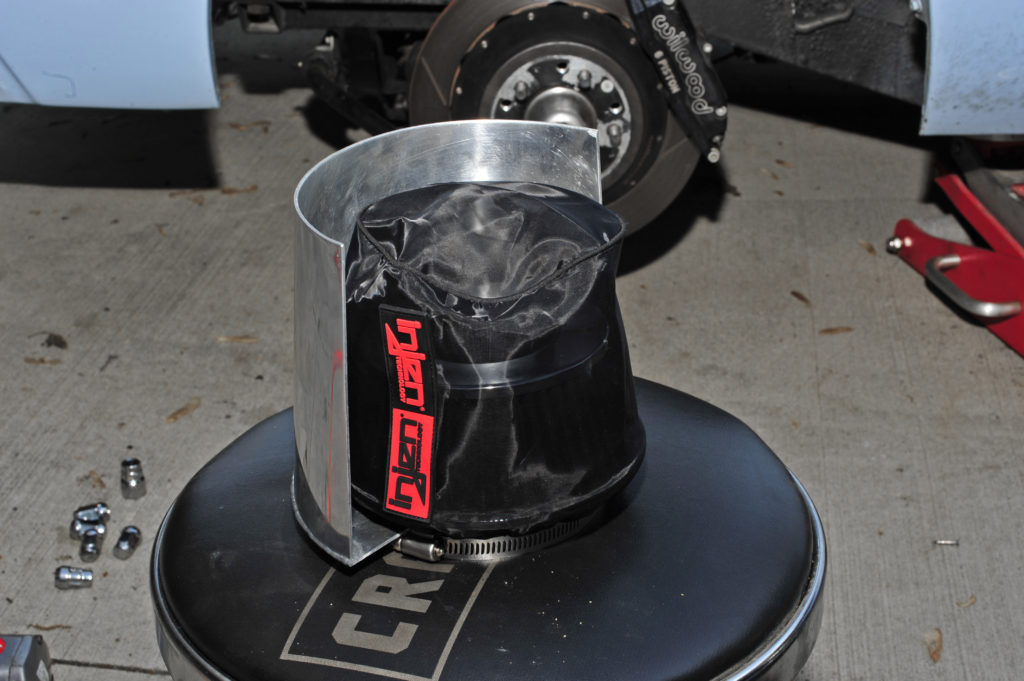
Hopefully, this arrangement will be enough to keep water from being sucked up through the filter in the event of rain.
Tire clearance with just the filter was fine. Once the splash shield was in place, however, the tire made contact at full or near full lock. All I did to address this was gently work the shield to reduce the outer diameter for some extra space. From what I can tell, the clearance is there. If there is contact with the tire I can do some more massaging. I think it’ll be fine, though.
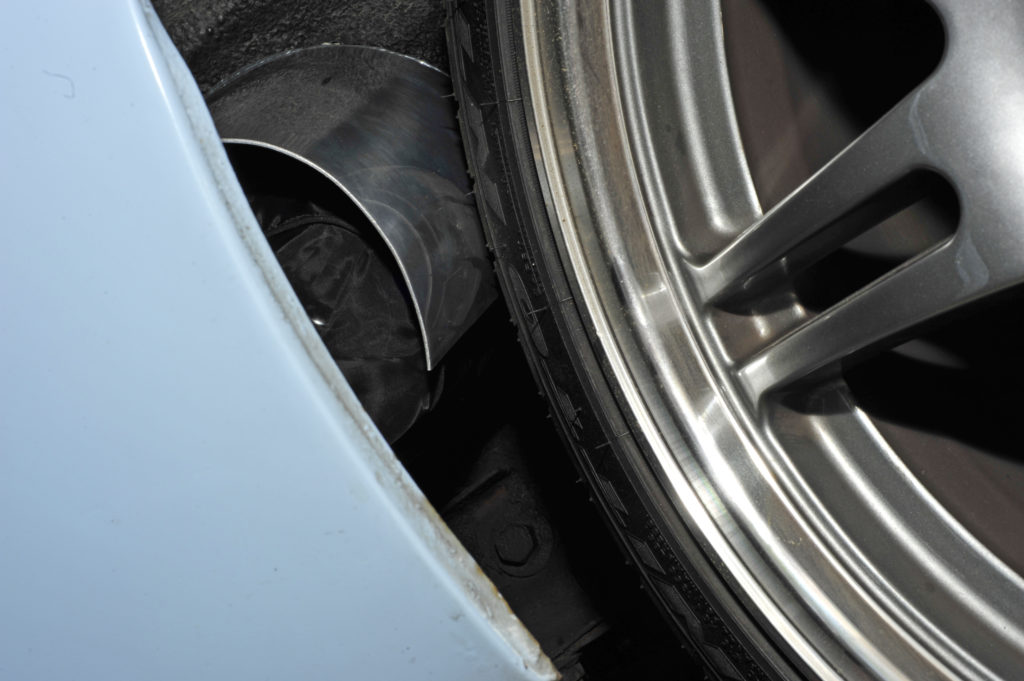
Yes, it looks like the tire is touching the shield, but it is not. Compress the suspension and it may be a different story. I think it’ll be fine.
I purchased some fancy Rustoleum spray paint with a “hammered” effect because I though the finish might approximate the texture of the 6.1 Hemi valve covers. Now that the project is done I kind of like the random, ramshackle vibe of the installation. It just kinda works with the overall feel of the Duster. I may change my mind but for now I consider this project done. Finished. Complete. And kick ass!