

Well, look at that. The wheel fell off, and something is broken. I think that’s what happened, at least.
Ha ha ha! That’s not what happened at all! But you, wise reader and navigator of the Interwebs, already knew that. This came about after a bit of work on the ol’ Charger this week, with the assistance of my faithfully assisting assistant, Jim. Also known as Uncle Jim, or as the shoes you might see in some of these pictures, if you look very carefully. He was nice enough to drive down from Murphy, NC for a couple of days to lend a hand to balancing some quite heavy parts on tiny wheels, drinking some beverages, and eating some foodstuffs… the automotive portion of which we shall see forthwith!

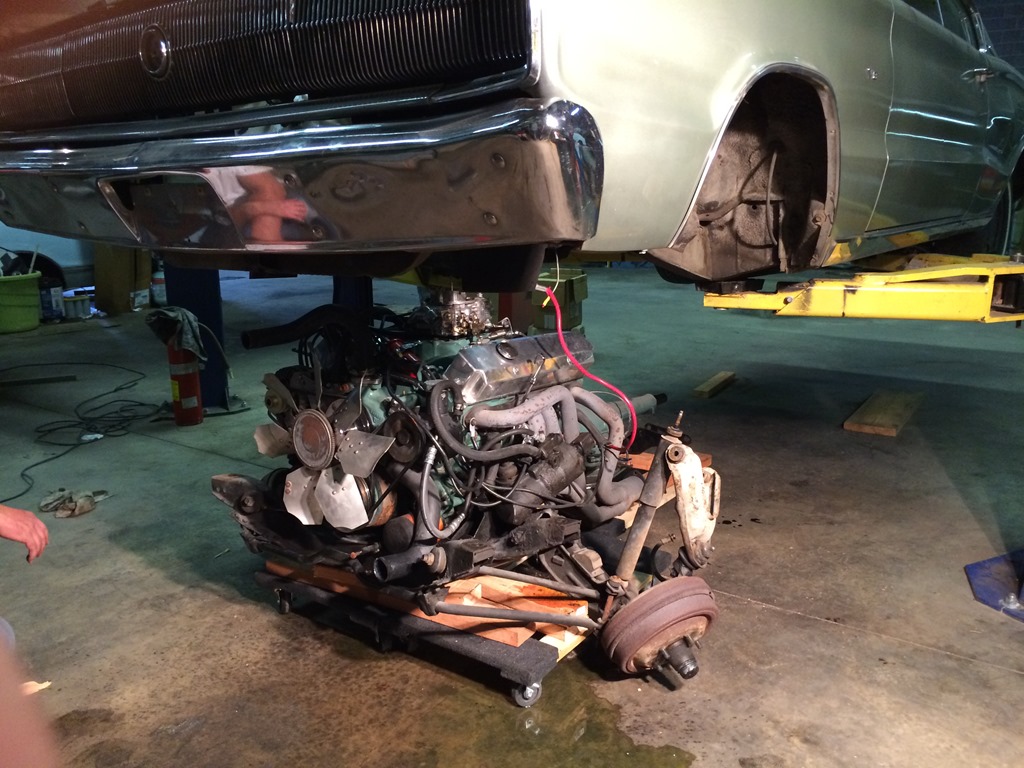
Under those very heavy things to the right, you can maybe just see some tiny wheels. That’s the engine, transmission, front K frame and suspension from my ‘66 Charger all sitting on 3 furniture dollies from Harbor Freight.
Worked like a charm. Here’s the down-low:
Loosen the torsion bar adjusters all the way. Remove the torsion bar retaining clips. Remove torsion bars with the tool that Bill loans you. Remove the 4 bolts that hold on the 2 upper control arms. Disconnect wires and hoses from the engine (drain the coolant! Do not drink it!). Disconnect the transmission linkage and speedometer cable.
Do not disconnect the neutral safety switch wire, so that after you lower the car onto the dollies, remove the 4 large (and very tight) bolts that hold the K frame to the chassis and subsequently actuate the lift to raise the car off of the aforementioned assembly, you can dramatically reach under the car and SNIP the wire as it is straining mightily against the load.
It’s swell, trust me. 
Then, well, it’s out. Just sitting there. Heavy, but mobile.
 After this bit of hijinx, we were able to focus on a bit of drilling and grinding – removing the bump stop brackets from inside the front wheel wells. Drill out the spot welds, and knock ‘em off. Not too bad, really. A little clean up with the flap disc, and a shot of paint, and the chassis is ready for the new RMS AlterKtion K member.

With a bit of work juggling the little furniture dollies, and some twisting of wrenches, the transmission and engine were separated. That same evening, the trans was delivered into the waiting hands of my chosen transmission rebuilder for whatever attention it needs. Oh, and check out that flex plate weight. This 440 has a late model cast crank, meaning it’s externally balanced; both the balancer at the front and the rear plate have offset weights on them. In the case of my flexplate, it’s a very ugly welded weight – it belongs there, but boy they didn’t do it in a very attractive way.

Then, mount the engine to a stand. Engines look so cool on a stand, I think. Especially still “dressed,” like this one.

So, naturally, we started to tear it down in preparation for the new heads and cam. Note here the source of my previously battled header leaks. As I had surmised, the gasket was toasted.

A bit more teardown, and I get my first look inside the cylinders of this motor. Obviously still very fresh, with some crosshatch still visible on the cylinder walls, and no ridge at the top. That piston in the foreground is at the top of its stroke. A later measurement put it nearly .020” below deck. This, coupled with some research on the part #’s I could spot on the pistons affirmed that this freshly rebuilt motor was built (nicely) back to stock. Unfortunately, that’s circa 1977 smog motor stock, meaning it was just under 8:1 compression, and no head choice was going to get me over about 8.6:1. Not good for performance, so…teardown time.

The crank, connecting rods and bearings all looked fine to me, with no odd wear patterns. This is all very good. The block and associated parts will be at the machine shop on Monday for further inspection. If everything checks out, we could get away with a cleaning, honing, new bearings and a new set of earlier spec pistons, which could get me close to my 10:1 compression target. 
Meanwhile, the new lifters, cam and timing set arrived. Shiny new engine parts! Hooray!
My plan was to mock up the front suspension (to ensure a smooth fit), do the brake plumbing, major engine compartment wiring and firewall work for the AC system, then when the engine is ready, mount it to the K frame, and drop the car back on to it. Should be fun.

So here’s the driver’s side mocked up. Attentive readers will note the absence of the 2 bolts that tie the shock mount to the front subframe – the holes are there, but the bolts are not, currently. But they will be on final install! 
From inside the engine compartment, you can check out the new steering rack, and see the configuration of the tubular K frame. So much room in there, when compared to the old stamped steel setup, and its associated torsion bars and forward strut rods. The sway bar is not in place here, but it mounts to the front of the K frame tube.

I loosely bolted the hubs onto the new spindles and mounted the front tires, so that I could lower the car and roll it for the first time in a few weeks. Now I can push it back a few feet for better access to the interior, so I can mount up the new AC system under the dash. 
Well, that brings us up to date, you and I. You know pretty much where things stand on the project, and I know nothing about you, or anything you’re doing. Which, I suppose, is how the internet works – I shout into the valley, and the best I hope for is the return of a bit of my own voice, as I like to think Henry John Deutschendorf might have said, if he gave a crap about cars, or the Internet. Or were not dead. (learn about your transfer valves, kids!)
And… Boring video!
Later, internauts!