

The 2013 Hot Rod Power Tour kicks off in Arlington, Texas in not quite three months. Meanwhile, the Duster is still more of a concept than an automobile. Like a phantom I occasionally catch a glimpse of from the corner of my eye which vanishes when I turn to face it head on. Things are happening, however, and I’m still confident things will come together on schedule.
Kevin from Fabrications Unlimited has been busying himself mostly with plumbing, brackets and cooling systems for the car’s engine and occupants. I had initially planned to install the radiator, fans, etc, as they seemed like something I could handle without much trouble. I ended up tasking Kevin to do the work since he needed to install the A/C condenser and figured it should all be done at once.
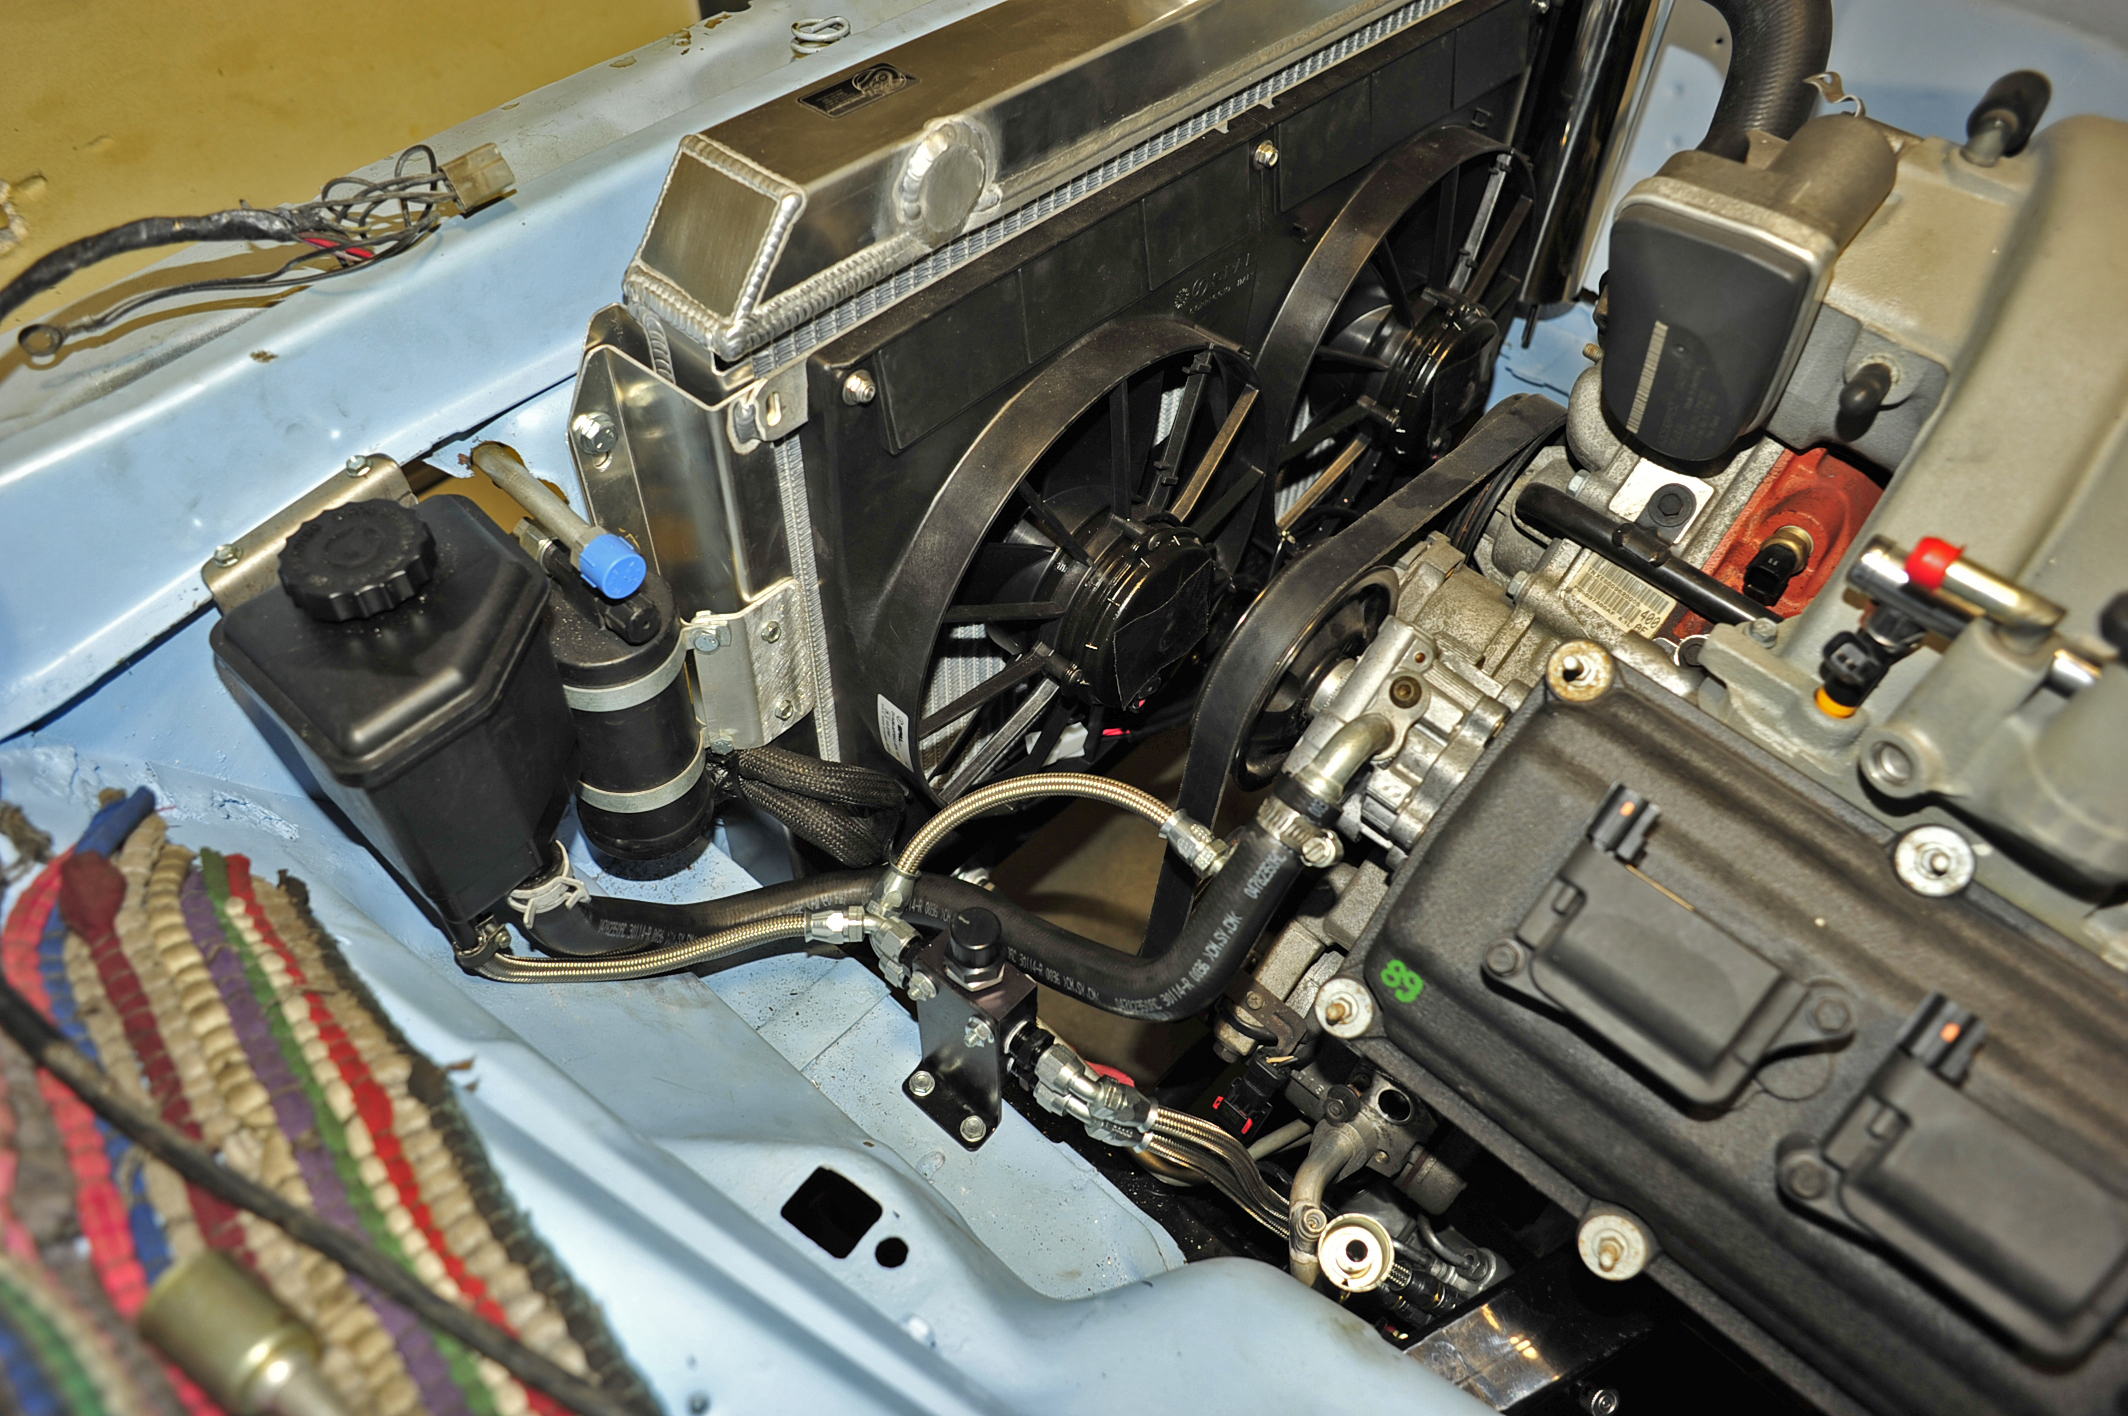
Check out the snazzy Be Cool radiator with twin electric fans. Also visible are the power steering fluid reservoir from the wrecked ’06 Charger, associated hoses and the pressure regulator which allows me to use the high-pressure factory pump without blowing up the steering rack. In theory, at least.
One vexing element to this project from the start has been figuring out a solution for headers or suitable exhaust manifolds. I thought I’d be able to use a pair of TTI headers that are specifically made for a 6.1 swap with the RMS K-frame but they only work if the starter is on the left side of the engine. My use of the NAG 1 transmission and the required placement of the starter on the right rule out the TTI offering. After considering several different designs, I saw a pair of mid-length headers in the Street & Performance catalog that look liked they might work. I gave S&P a call and they agreed that the headers might fit or at least be close, followed by a suggestion that they send me a pair that are tacked together so Kevin can modify them if necessary.
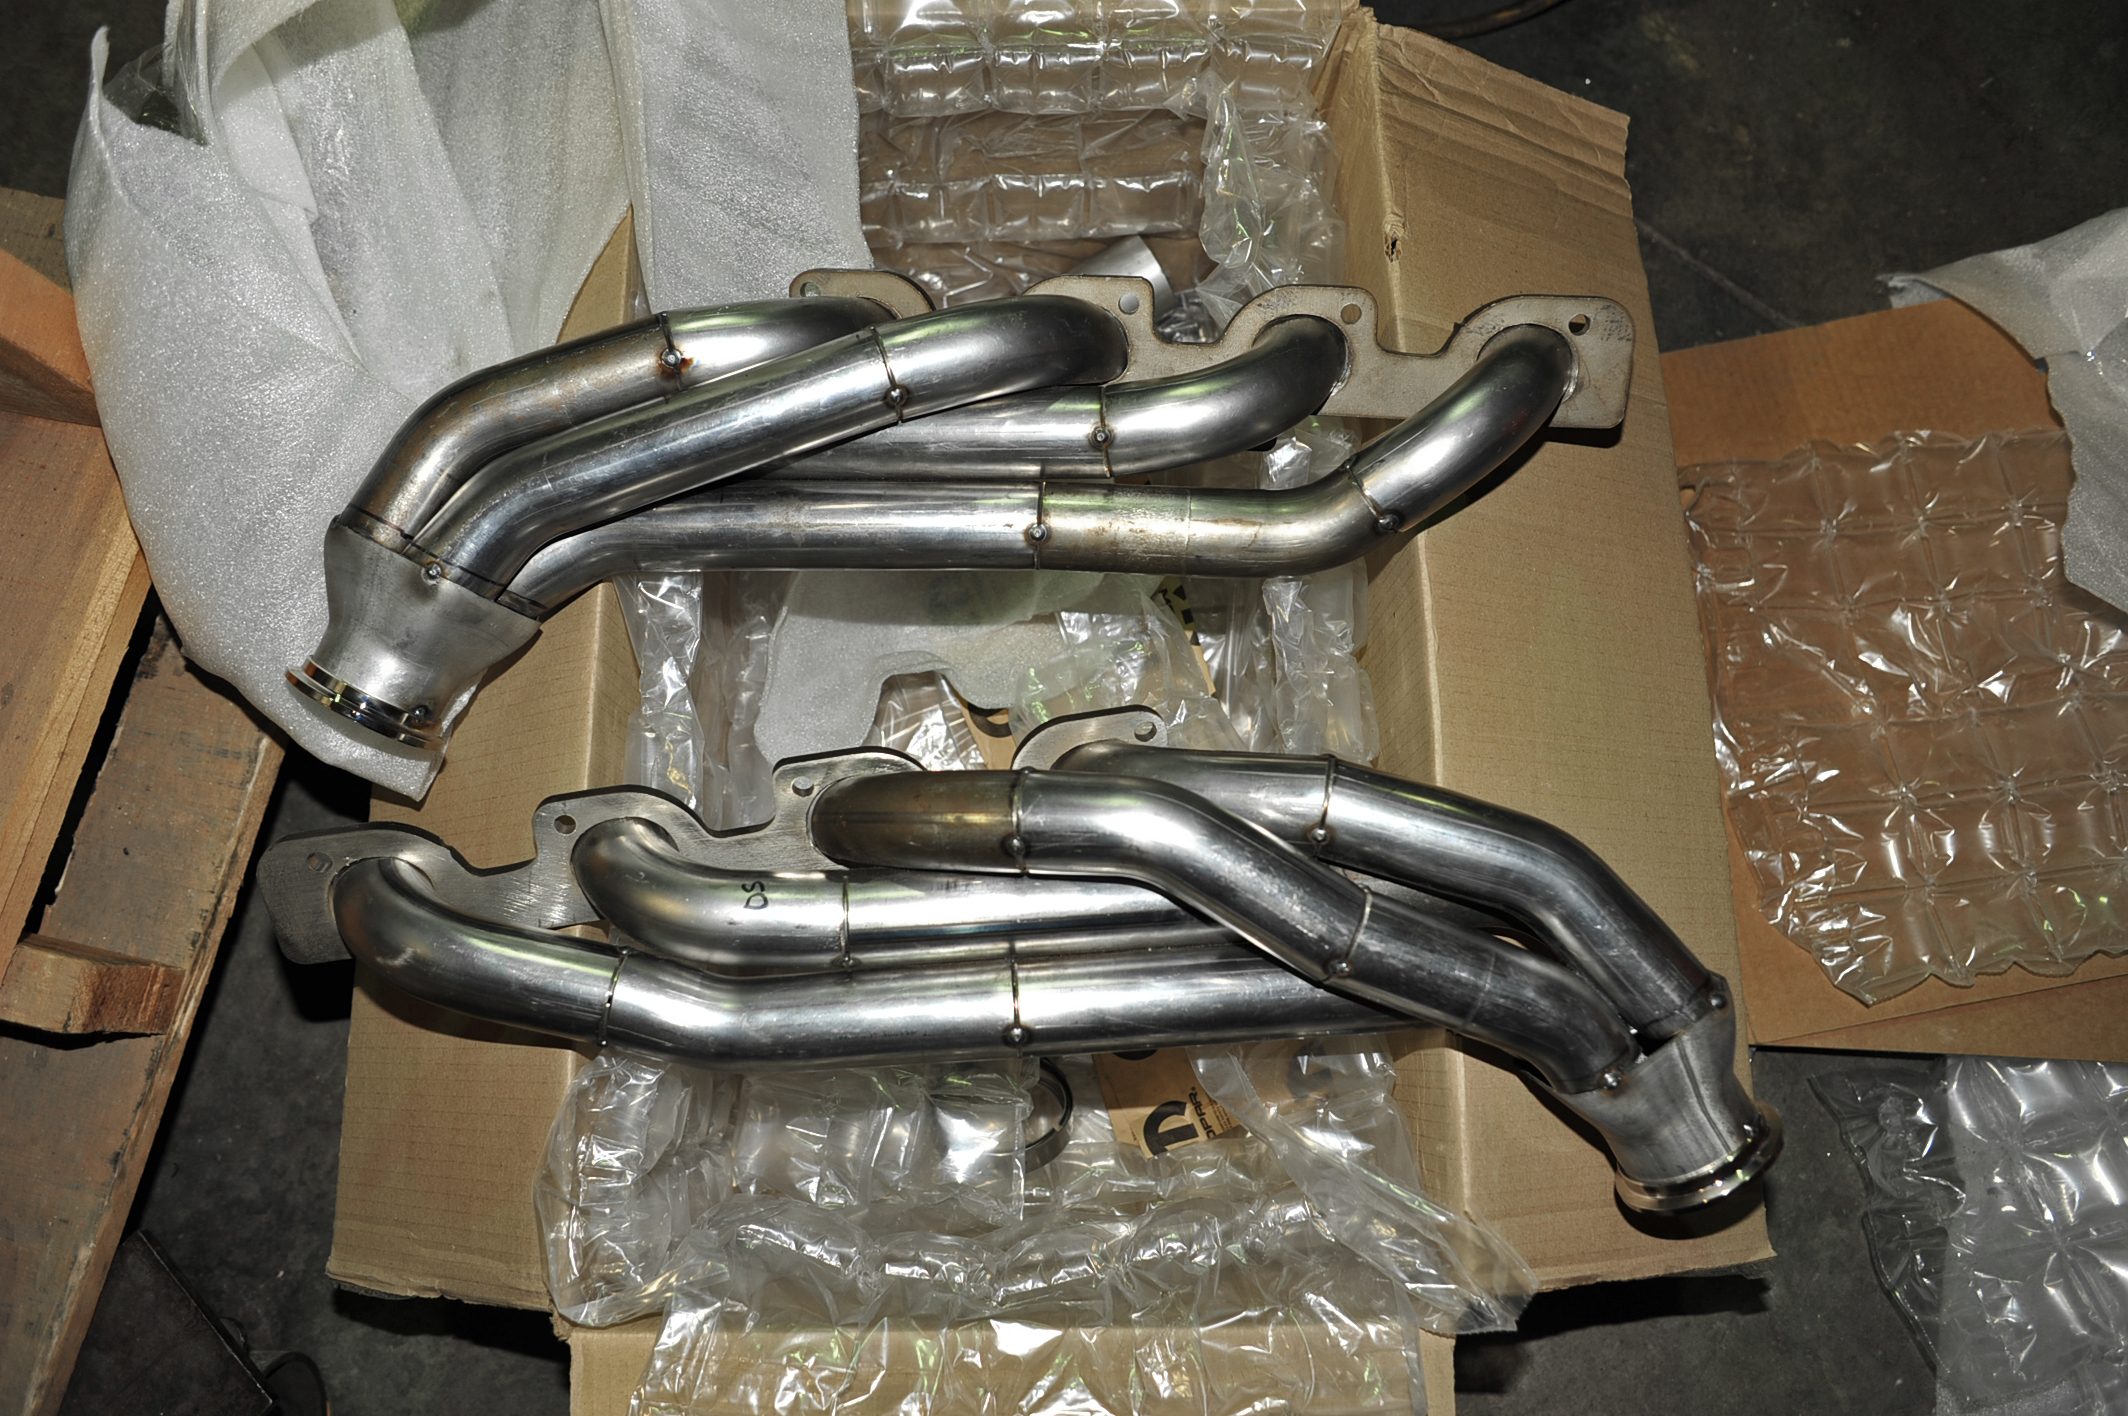
Here are the Street & Performance mid-length headers in their unfinished form. Take note of how compact they are and that they tightly hug the contours of the engine block. The build quality is evident even in their unfinished state.
Turns out, no modifications will be necessary. Instead, Kevin is going to make some minor changes to the firewall and the left motor mount. That motor mount sits at a nearly flat angle that offers very little room between it and the cylinder head. We decided to cut away the mount to make room for the primary tube and then box it back up and reinforce the bottom of the mount.
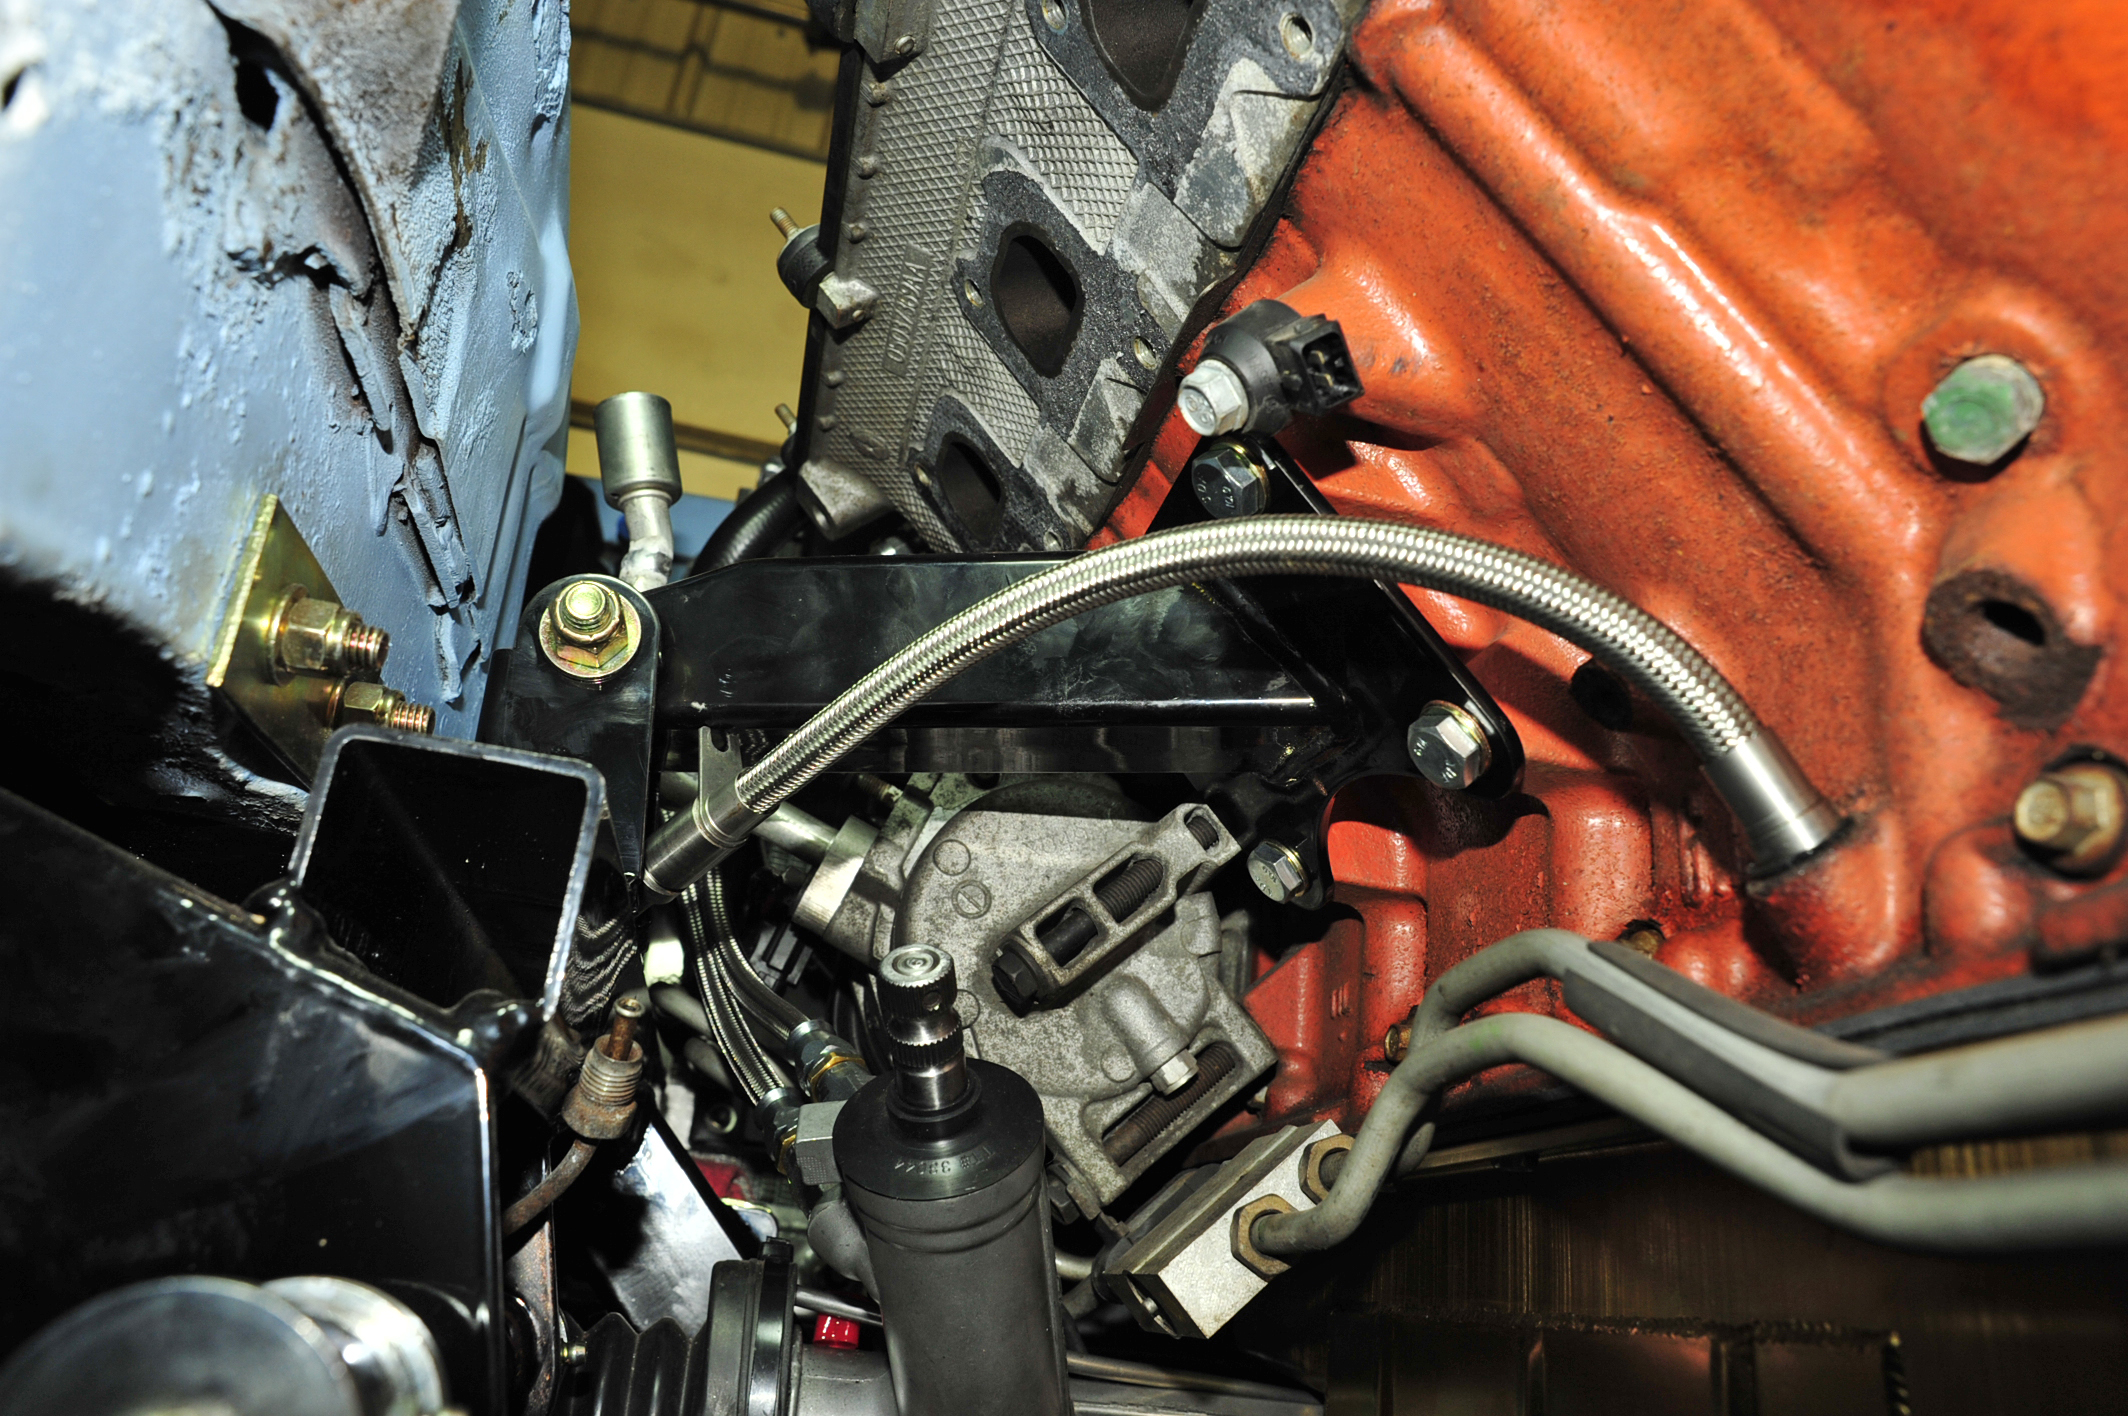
Not much room for headers, right? It seems the placement and angle of the motor mount is to make room for the steering rack and column. Our plan will maintain adequate space.
Let’s head out back and check out our solution for the fuel tank. Initially I thought I’d have to use a pricey custom fuel tank for this project. Instead, Kevin whipped up a quick schematic for a pump housing that he’ll install onto the original gas tank. Instead of having to drop another $700 to $1000 or whatever on a new tank, I gave the schematic and a credit card number to Rock Valley Auto Parts. For less than $400 they whipped up the part and away we go.

The gas tank in the Duster is flush with the trunk floor so the new set up is recessed to make room for the fuel lines. Since it’s likely that the hoses will rub and bounce on the edge of the tank, they will be of the braided variety.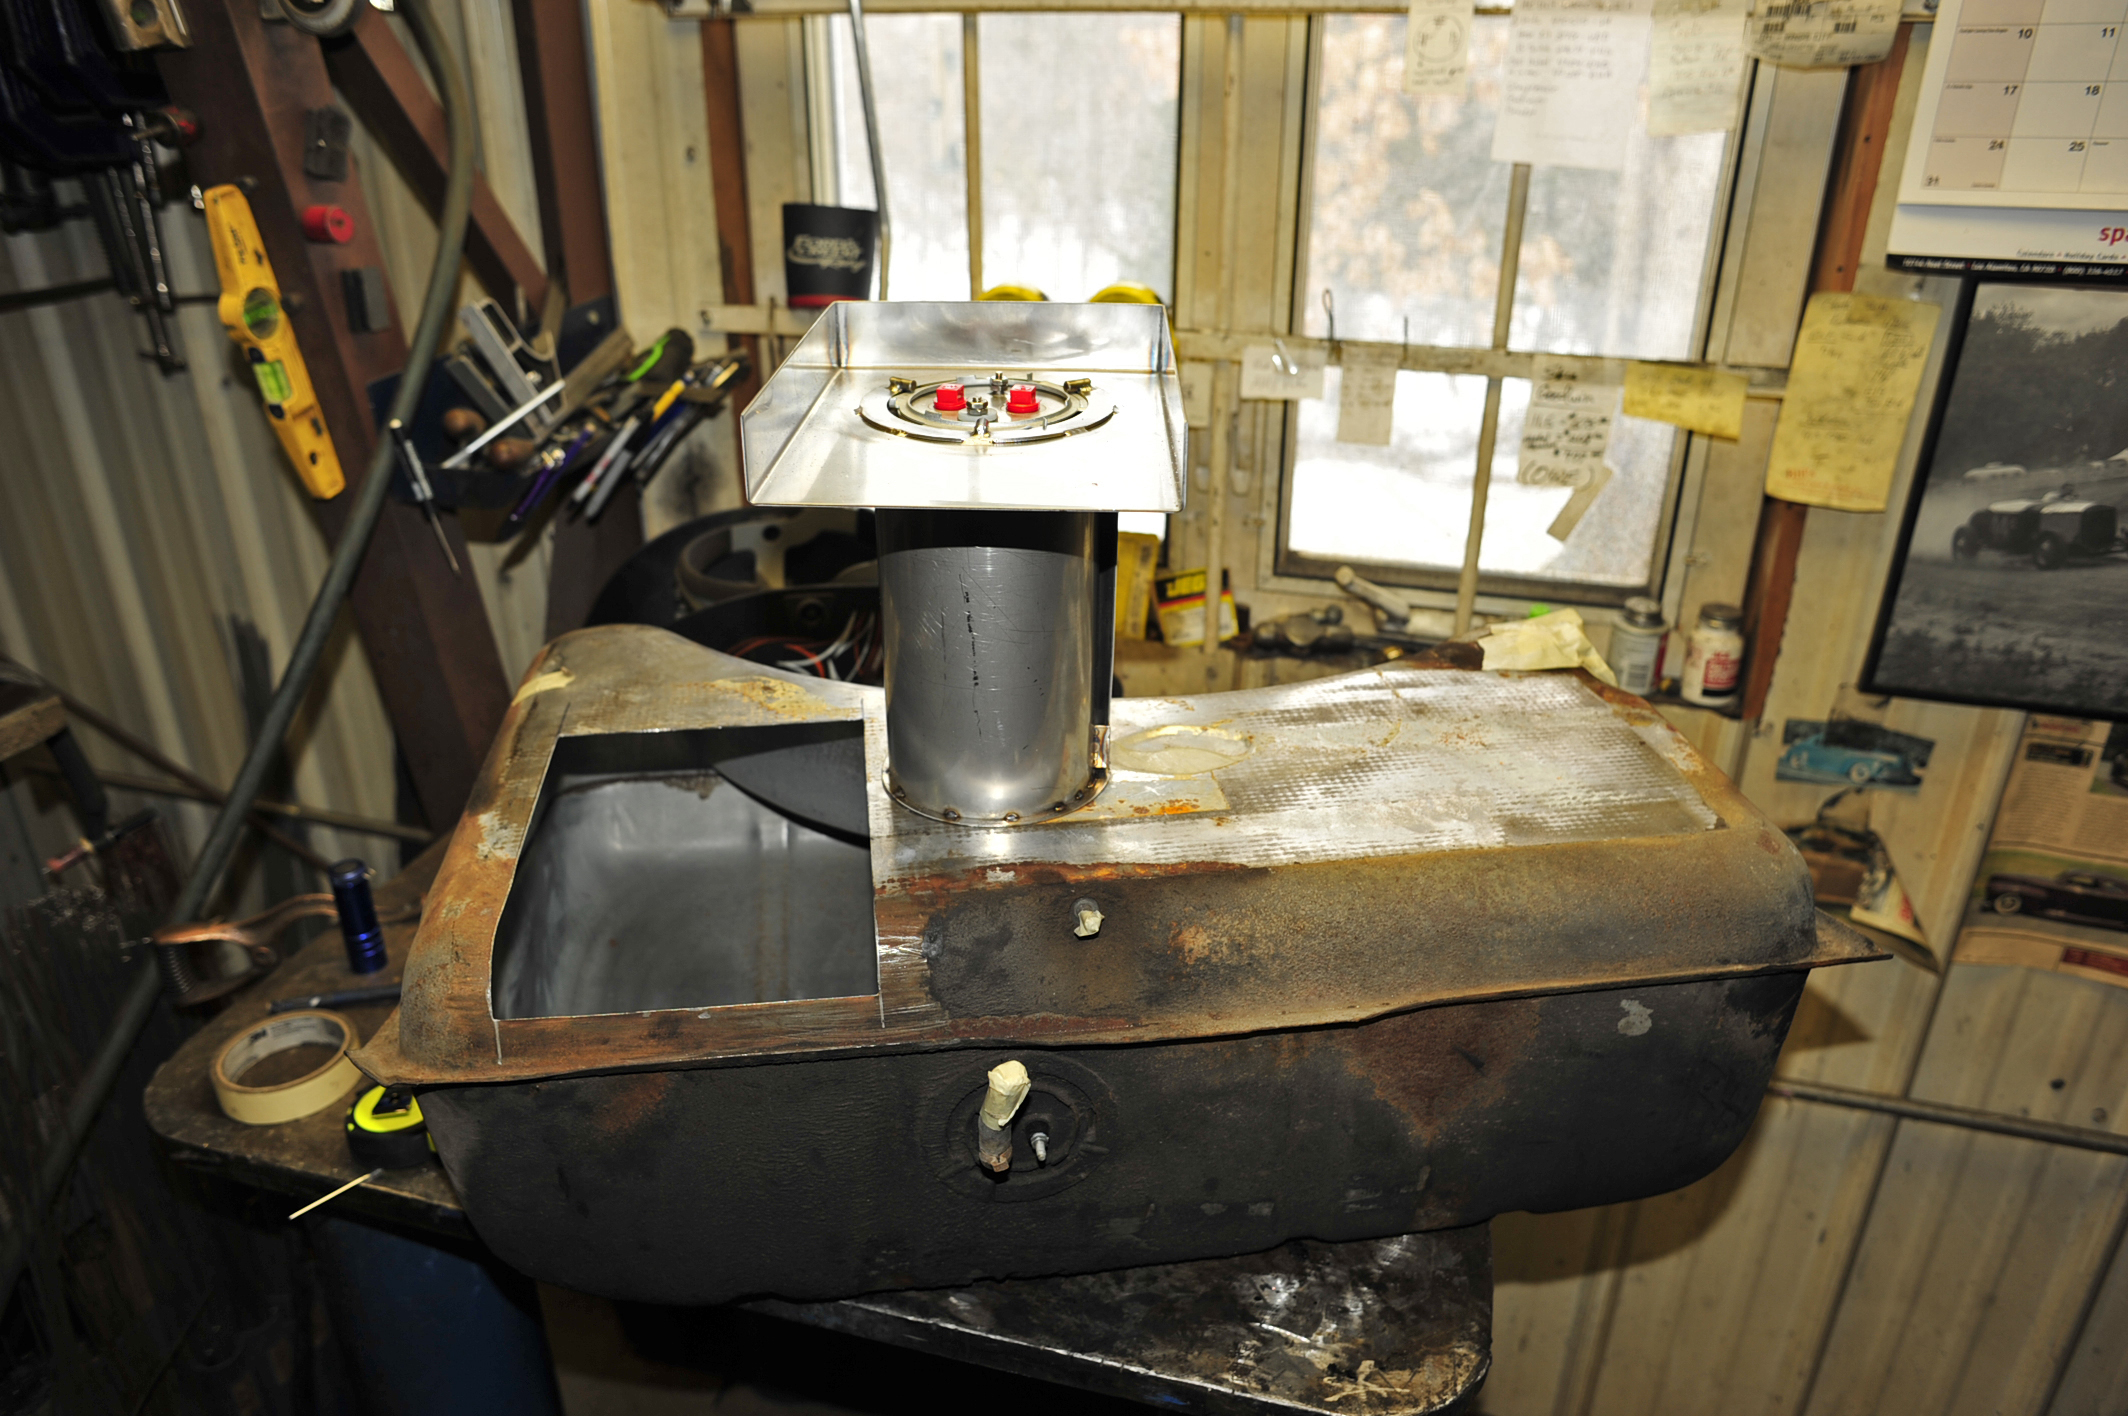
And now for the heavy: the center chuck for the rear end arrived. Jim and I conferred on the gear ratio and we decided to go with a 3.55:1. At one point I thought a 3.90:1 or 3.73:1 might work given the .82:1 ratio of the 5th gear in the NAG1 transmission. Then Jim started explaining something about the first and second gear ratios and that a 3.55:1 might be better. As is usual when Jim starts explaining something, my eyes kind of glazed over and I just agreed to whatever. He did vow to pay for a new gear set if the 3.55s make the Duster a dog. He’s a man of his word so I’m not worried.
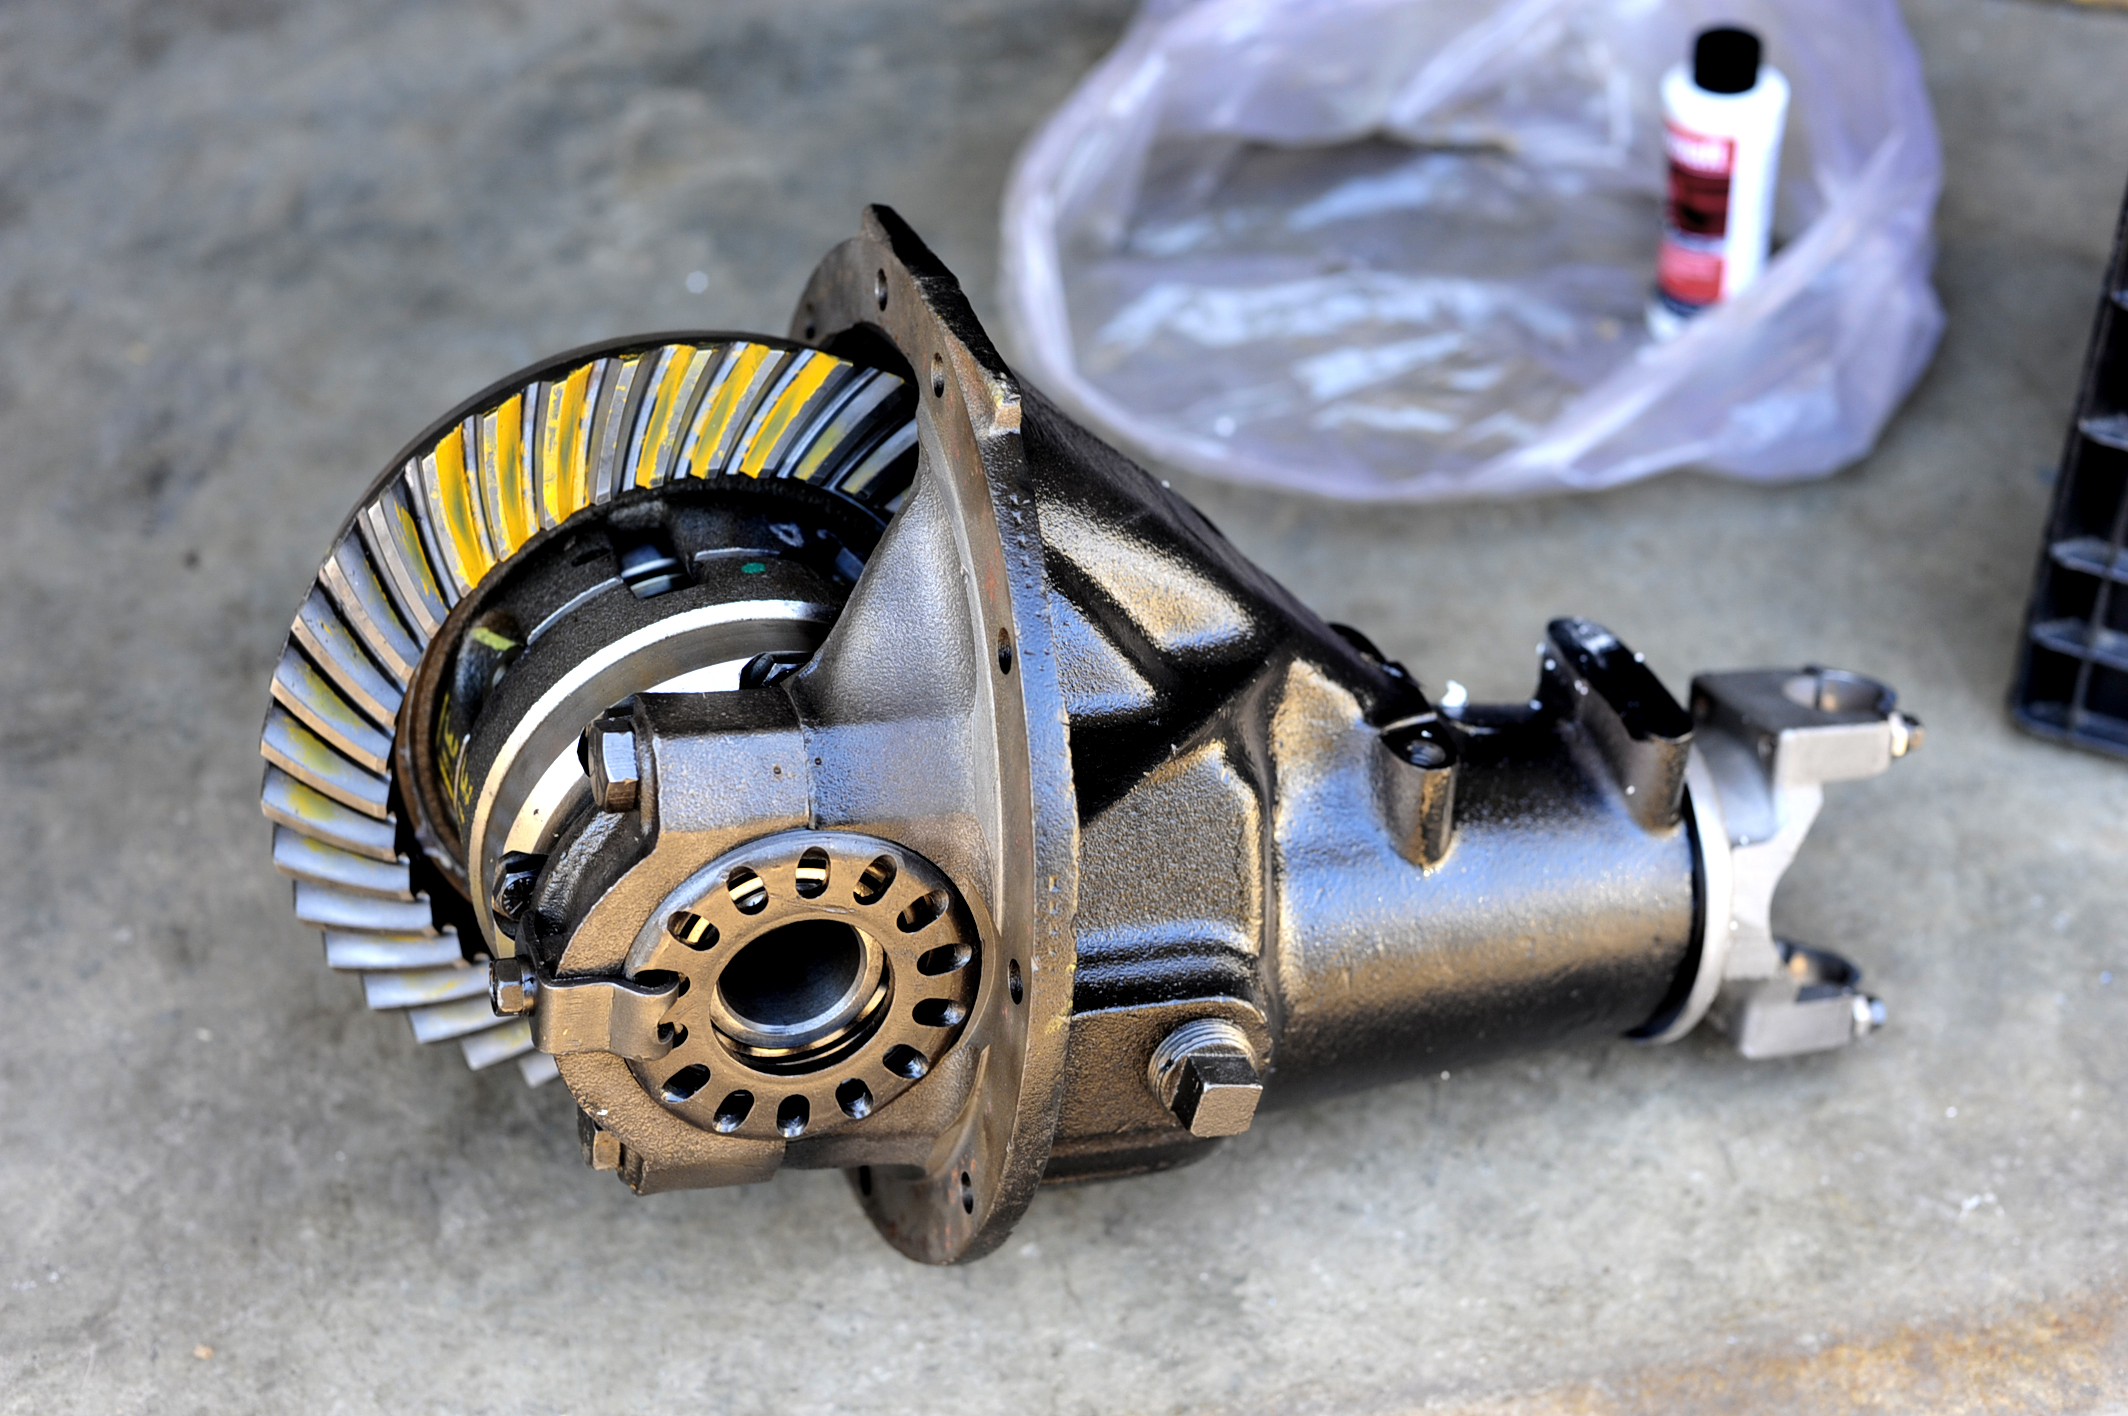
The 8.75″ housing is of the strong “489” variety and features the larger Yoke. It should be able to handle whatever nonsense the 6.1 and I send its way.
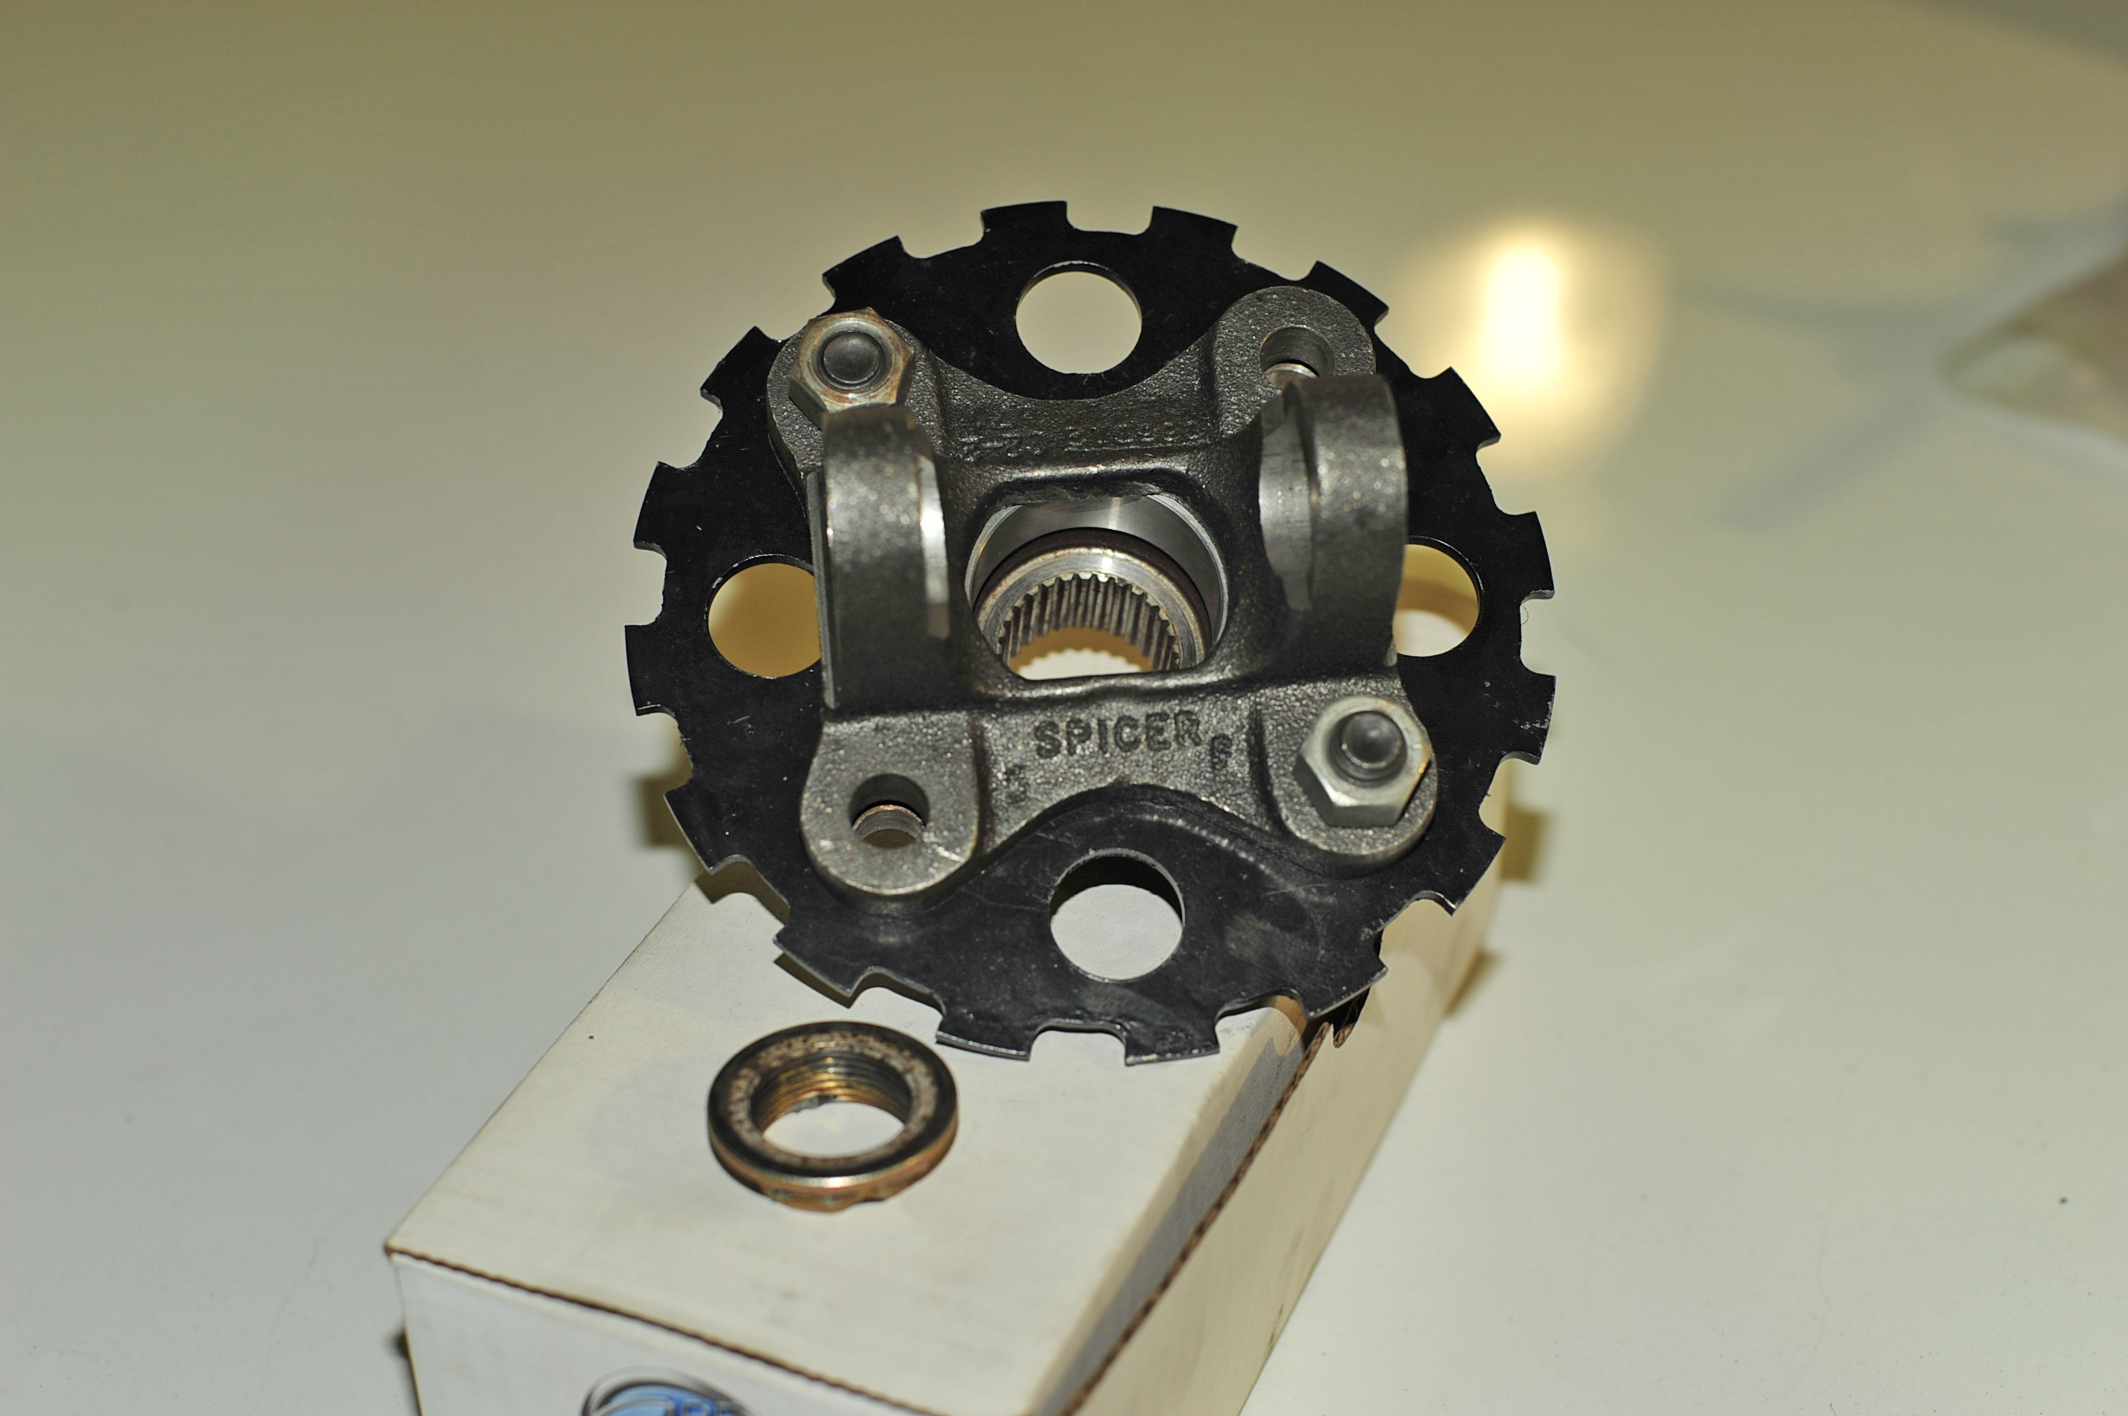
This is the reluctor gear that will be sandwiched between the drive shaft and the transmission output shaft. It will give speed sensors the information they need to send vital data to the NAG1 to make it actually work. It will not, however, generate a usable speedometer signal. Hi-ho!
Kevin will be done with his work by April 1. Then it’ll be on Jim to make the Duster run, move, stop, etc in time for a trip to Arlington.