
Well, not really. Actually, not at all. But it is the next installment of Charger Chat… And isn’t that.. Special?
When last we conversed, the 1966 Charger had been re carbureted, had an exhaust header leak fixed, and was generally just tooling the roads of The ATL like a boss. This has continued. The rattle/knocking of the headers whacking various engine compartment surfaces has also continued. I replaced both engine mounts, hoping to lift the engine up far enough to clear the steering box and the shock tower. Things improved, but not quite enough – I loosened all the bolts on the motor mounts, and discovered that the Super Genius that installed the engine chose to install one of the mounting plates (holds the mount to the engine block) with the bolt inserted from the front toward the back –  the nut to the rear of the car. Which would seem ok at the time, since he did it BEFORE INSTALLING THE FREAKING OIL PUMP, which means of course the bolt can’t be removed without also removing the oil pump to get it out. Unless… Yes, unless we cut the damned thing off. Which is what I did.
 Cut it right off, and installed the new mount with a new bolt, this time from the rear, with the nut toward the front. Clever, ‘eh? Oh, this didn’t solve the overall issue, which was the headers being in firm contact with both the passenger side shock tower and the steering box on the drivers side. Better, but not clear of both. So, I made a spacer. Fantastico!
Observe the majesty of a 1/4” spacer. OBSERVE IT! This managed to be just enough to give clearance on both sides. Roughly enough to pass a moderately priced business card between, but it’s no longer touching. For a long term solution, research told me that the fancy poly-loc mounts available from Schumacher Creative would probably help to keep the engine where it belonged, so I ordered some. CHA-CHING!
Working on the Master Plans, consulting my lists and spreadsheets (not kidding,) I also ordered a pair of 2” drop front spindles from Magnum Force. Figured I’d get the suspension show on the ol’ road, as well. Time passes. Weeks, before either of those two orders show up. Time that gives me too much… time to plan.
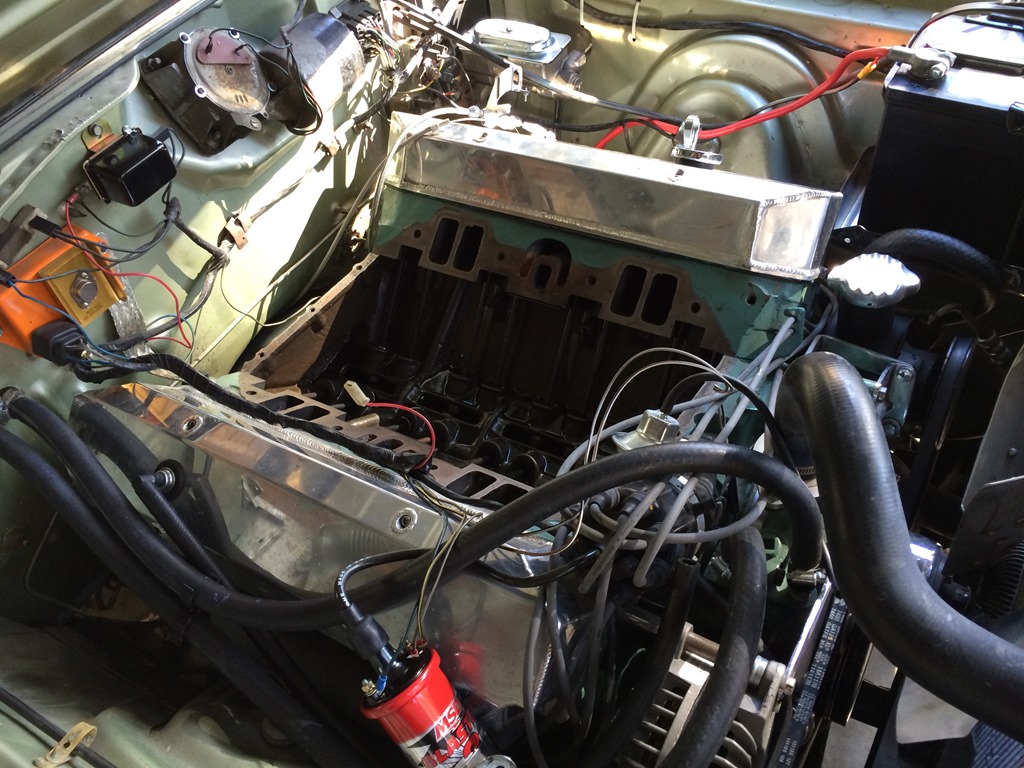
Also time to do some other work on the ol’ heap. The Charger had been running pretty well, but not great. Some random rough running was beginning to REALLY annoy me. New plugs, wires (with fancy heat booties, to avoid burning them on the STUPID SHITTY HEADERS)  and another replacement of the intake manifold gasket seemed to clear all that up. Turns out, it was a leak on the underside of the intake manifold (remember me messing with that before? Yeah, me too,) that was causing the rough running.
  I did also install a very snazzy ignition box from The R/T Garage called… Wait for it… THE REV-N-NATOR. Yes, it’s N-Nator, not N-ator. I don’t know why. But it is a pretty nice bit of kit. A direct replacement for the factory mopar transistor ignition box on the firewall – remove the old one, plug in this new one, and you get a stronger, more consistent spark (courtesy of some buffering/smoothing), and as well a rev limiter. Not that I needed that part, but it’s a nice part. Too bad I won’t be using it long… (foreshadowing).
 The ol’ Charger has dual exhaust, naturally, and whilst decent enough, it features knockoff Flowmaster mufflers, and no crossover pipe – giving me the kind of exhaust note I don’t like. So, off to Magic Muffler, where $30 got me a crossover pipe made up and installed. Money well spent. Even if I won’t be using that exhaust system too much longer, either.
Seeing any trend or theme here?
While under the car @ the exhaust shop, I got a good look at some mystery steel bits – here they are. The dude who made up the crossover pipe was an older gentleman, with some obvious experience. He identified them before I could figure it out, I’m sad to say… Any guesses?

That’s right, sports fans! The remnants of a trailer hitch. Back when people thought it was ok to just pull a trailer with a car, rather than buying the biggest truck they could find to occasionally pull the family pop up camper. So, I’ll be cutting those off, should I have some reason to be back there doing stuff… Which I do.
So, what else has been going on with the Charger… Let’s see. I cleaned some interior parts. Pulled out the headliner, and John @ The Mad Stitcher was able to find some OE headliner material to fix it up for me. That’ll be nice, when it’s back in, as it was previously covered in a horrific pool table green color. Entirely wrong. There’s another header exhaust leak – small one – on the drivers side, in the center. I went to torque the bolt down again, and it was obviously not holding. Great. Brilliant. Another stripped hole. I pulled got the tools ready, convinced that this was another hole I could *barely* get to with my right angle drill, tap, and helicoil kit. Pulled the bolt, looked at it, and realized it was a Chevy header bolt. Too short. I rummaged around in my box o’ exhaust bolts, and found a longer replacement. Bingo! long enough to catch threads, and get a solid clamp on the header. Unfortunately, the gasket must be blown out the bottom (from running loose,) and the leak lingers. Annoying. But this won’t be a problem forever..
Meanwhile, I’ve been doing some work with the instrument cluster – dedicated, determined and reliable readers will remember that the Oil pressure and Temperature gauges are inoperable, and their little needles don’t light up, either. Luckily, there are a couple of companies that do restoration, repair and calibration of the clusters. But that is naturally too easy. So I’ve picked up a couple of additional clusters on ebay. Now, one of them is nearly complete crap, and the seller should be ashamed of themselves. It did yield a couple of functioning gauges, however. The 2nd cluster is in better shape (and complete, unlike the other one with the mysteriously missing odometer…), and also has plenty of useful parts. New overlays (available,) and they’ll look as good as new. I’ve also gotten a replacement solid state voltage regulator and tach driver from RTE (Real Time Engineering). The ‘66 uses a specific type of circuit to drive the tachometer, converting pulses from the coil into a drive voltage to swing the tach. Mine functions, currently, but whilst I’ve got everything apart… Might as well replace it. The voltage regulator takes the 12V from the car harness and makes a steady 5V to drive the fuel gauge, oil pressure and temp gauges. The stock setup is a mechanical vibrator setup, and they’re prone to failure; that’s probably what killed my gauges. BASTARDS. Anyhow, I’ll get the cluster spiffed up, and sell off the unused leftovers on teh ebays.
Damn, all the foreshadowing is making me tired. Let’s look at some pictures.

Boxes. Yes, boxes!

One had a distributor in it. Well isn’t that neat?

The other one had all THIS crap in it. Extra neat!

Oh, the boxes keep on coming, around here. 2 more boxes, 2 more thingies! One of which came with a VERY stern warning.

No pussyfooting around, here. WILL RESULT IN INJURY OR LOSS OF LIFE. 
And, more boxes still gave forth this bounty.

Well, what’s going on here? All manner of things. I finally settled on the direction and specifics of this build. And it’s going to be pretty snazzy.
I worked up a plan that included the full Hotchkis TVS suspension setup – a great looking setup that leverages the original (and pretty advanced) torsion bar setup with improved A arms for more advanced geometry, and updated leaf springs in the rear to dramatically improve the ride and handling. This, combined with 4 wheel power disc brakes, the addition of Air Conditioning, and a Gear Vendors overdrive, would make for a nice driving Power Tour and beyond car.
Additional research started to put me off the gear vendors setup. It’s very expensive, and still not a complete bolt-in, apparently. So I started looking for an alternative Overdrive option. Then I discovered that the 727 currently in the car needs work – it’s not shifting correctly. Ugh.
The suspension setup was causing me angst as well – I was chasing 2 parameters, maximum value, and avoiding copying what Bill had done with his Duster – he used the Reilly Motor Sports AlterKtion and Street Lynx setups front and rear, respectively. The AlterKtion is a pretty slick setup – coil overs, rack and pinion steering and sway bar all hung from a new, lightweight K frame. By the time I priced out doing the Hotchkis Setup, with all the parts it would require to make a great driving car, including a new, uprated steering box, springs, torsion bars, etc., the pricing was no longer a slam dunk over the Reilly (RMS) setup. Uh-oh. The die is cast.
So, here’s how it’s going to lay out.
– I’m copying Bill for the suspension RMS AlterKtion up front, Street Lynx in the rear.
– Wilwood brakes on all 4 corners (which I was doing ANYHOW) This means:
– New 18” wheels and tires, yet to be chosen
– Because the engine has to come out ANYHOW to replace the K frame, it will get a new cam and lifters, and new heads.
– Because the headers suck, new ones from TTI will be installed, with matching exhaust system
– The engine gets a little more loving via the above pictured EFI setup from FAST- it’s the new EZ EFI 2.0 setup, and will be provided fuel via the Aeromotive Phantom in tank pump also pictured above.
– As for the overdrive, I’ve ordered the Keisler A41 Automatic; a 4 speed overdrive automatic that SHOULD be a bolt-in proposition, as it is completely engineered for this precise application. Time will tell.
– Rear end will get a new center chunk with 3.55 gears, an Eaton Trutrac, and new axles to go with the 4 link coilover setup.
– Inside, Classic Auto Air is providing the air conditioning, I’ll replace the carpets (they’re a little tired, and not quite the right color), and install some solution for tuneage.
I think that covers it. Nearly everything is ordered and on the way, and should be here by mid February. Watch this space for thrilling updates, sports fans! And don’t forget to
BE SURE TO DRINK YOUR OVALTINE.