
When I get the frame and axle housing back from being painted, I’ll begin the task of attaching new suspension, steering, and drive train bits. To that end, I’m trying to make sure I have everything gathered in order to begin the construction phase of this project with some degree of alacrity. Chief among these bits is a rebuilt differential. For the differentially challenged (like I was a few months ago), there’s a video from 1937 that does a better job of describing the purpose and function of a differential than anything else I’ve seen. Plus, there’s band music and crazy motorcycle stunts. I really recommend that you watch it, regardless of your automotive inclination. Go ahead. I’ll wait. Skip on to about the 1:50 mark when you get tired of Snake Oiler and the Motorcycle Acrobatic Team.
Edit: For some reason, the YouTube embedded videos aren’t working, so I’m reverting to old fashioned text links. You’re going to have to deal with it.
Old, yet neat and easy to understand video about differentials
The Wide Ride originally had an open differential like the one featured in the video with a 3.08 to 1 ring and pinion set. That means that every time the drive shaft and pinion gear spun around 3.08 times, the axle spun around once. Now, the problem you run into with an open differential is that if one drive wheel starts to slip, the other wheel will be supplied with very little power and it will just sit there. Here…Ms. Vito can explain this one:
Humorous, yet relevant movie scene
Going forward, The Rider will have a limited slip differential and a 3.55 to 1 ring and pinion set. The differential I chose is by a company called Nitro Gear and Axle. It’s basically a beefed up version of the Positraction differentials that were originally available for this car back in the day. The 64 Skylark may not have been available with Positraction, but the Wide Ride was. The new diff is a clutch pack design and it’s function is described in yet another video. This one is entirely optional so if you’re lazy, don’t watch it.
Informative, yet not completely necessary video about clutch pack differentials
OK, from here on out, I’m pretty much just going with captioned photos. Cool? Cool.
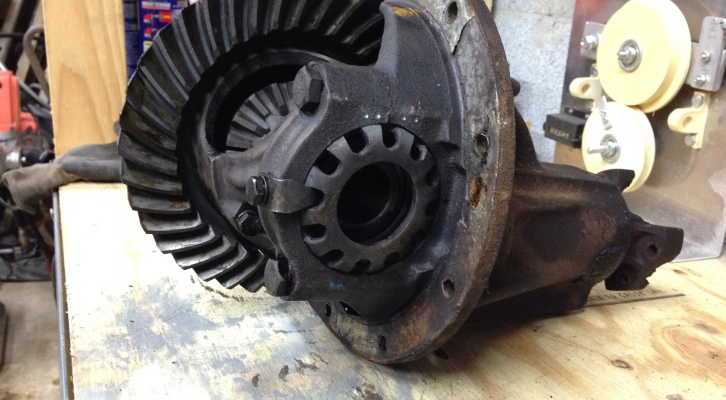
The old, open differential still mounted in the carrier. (chunk)
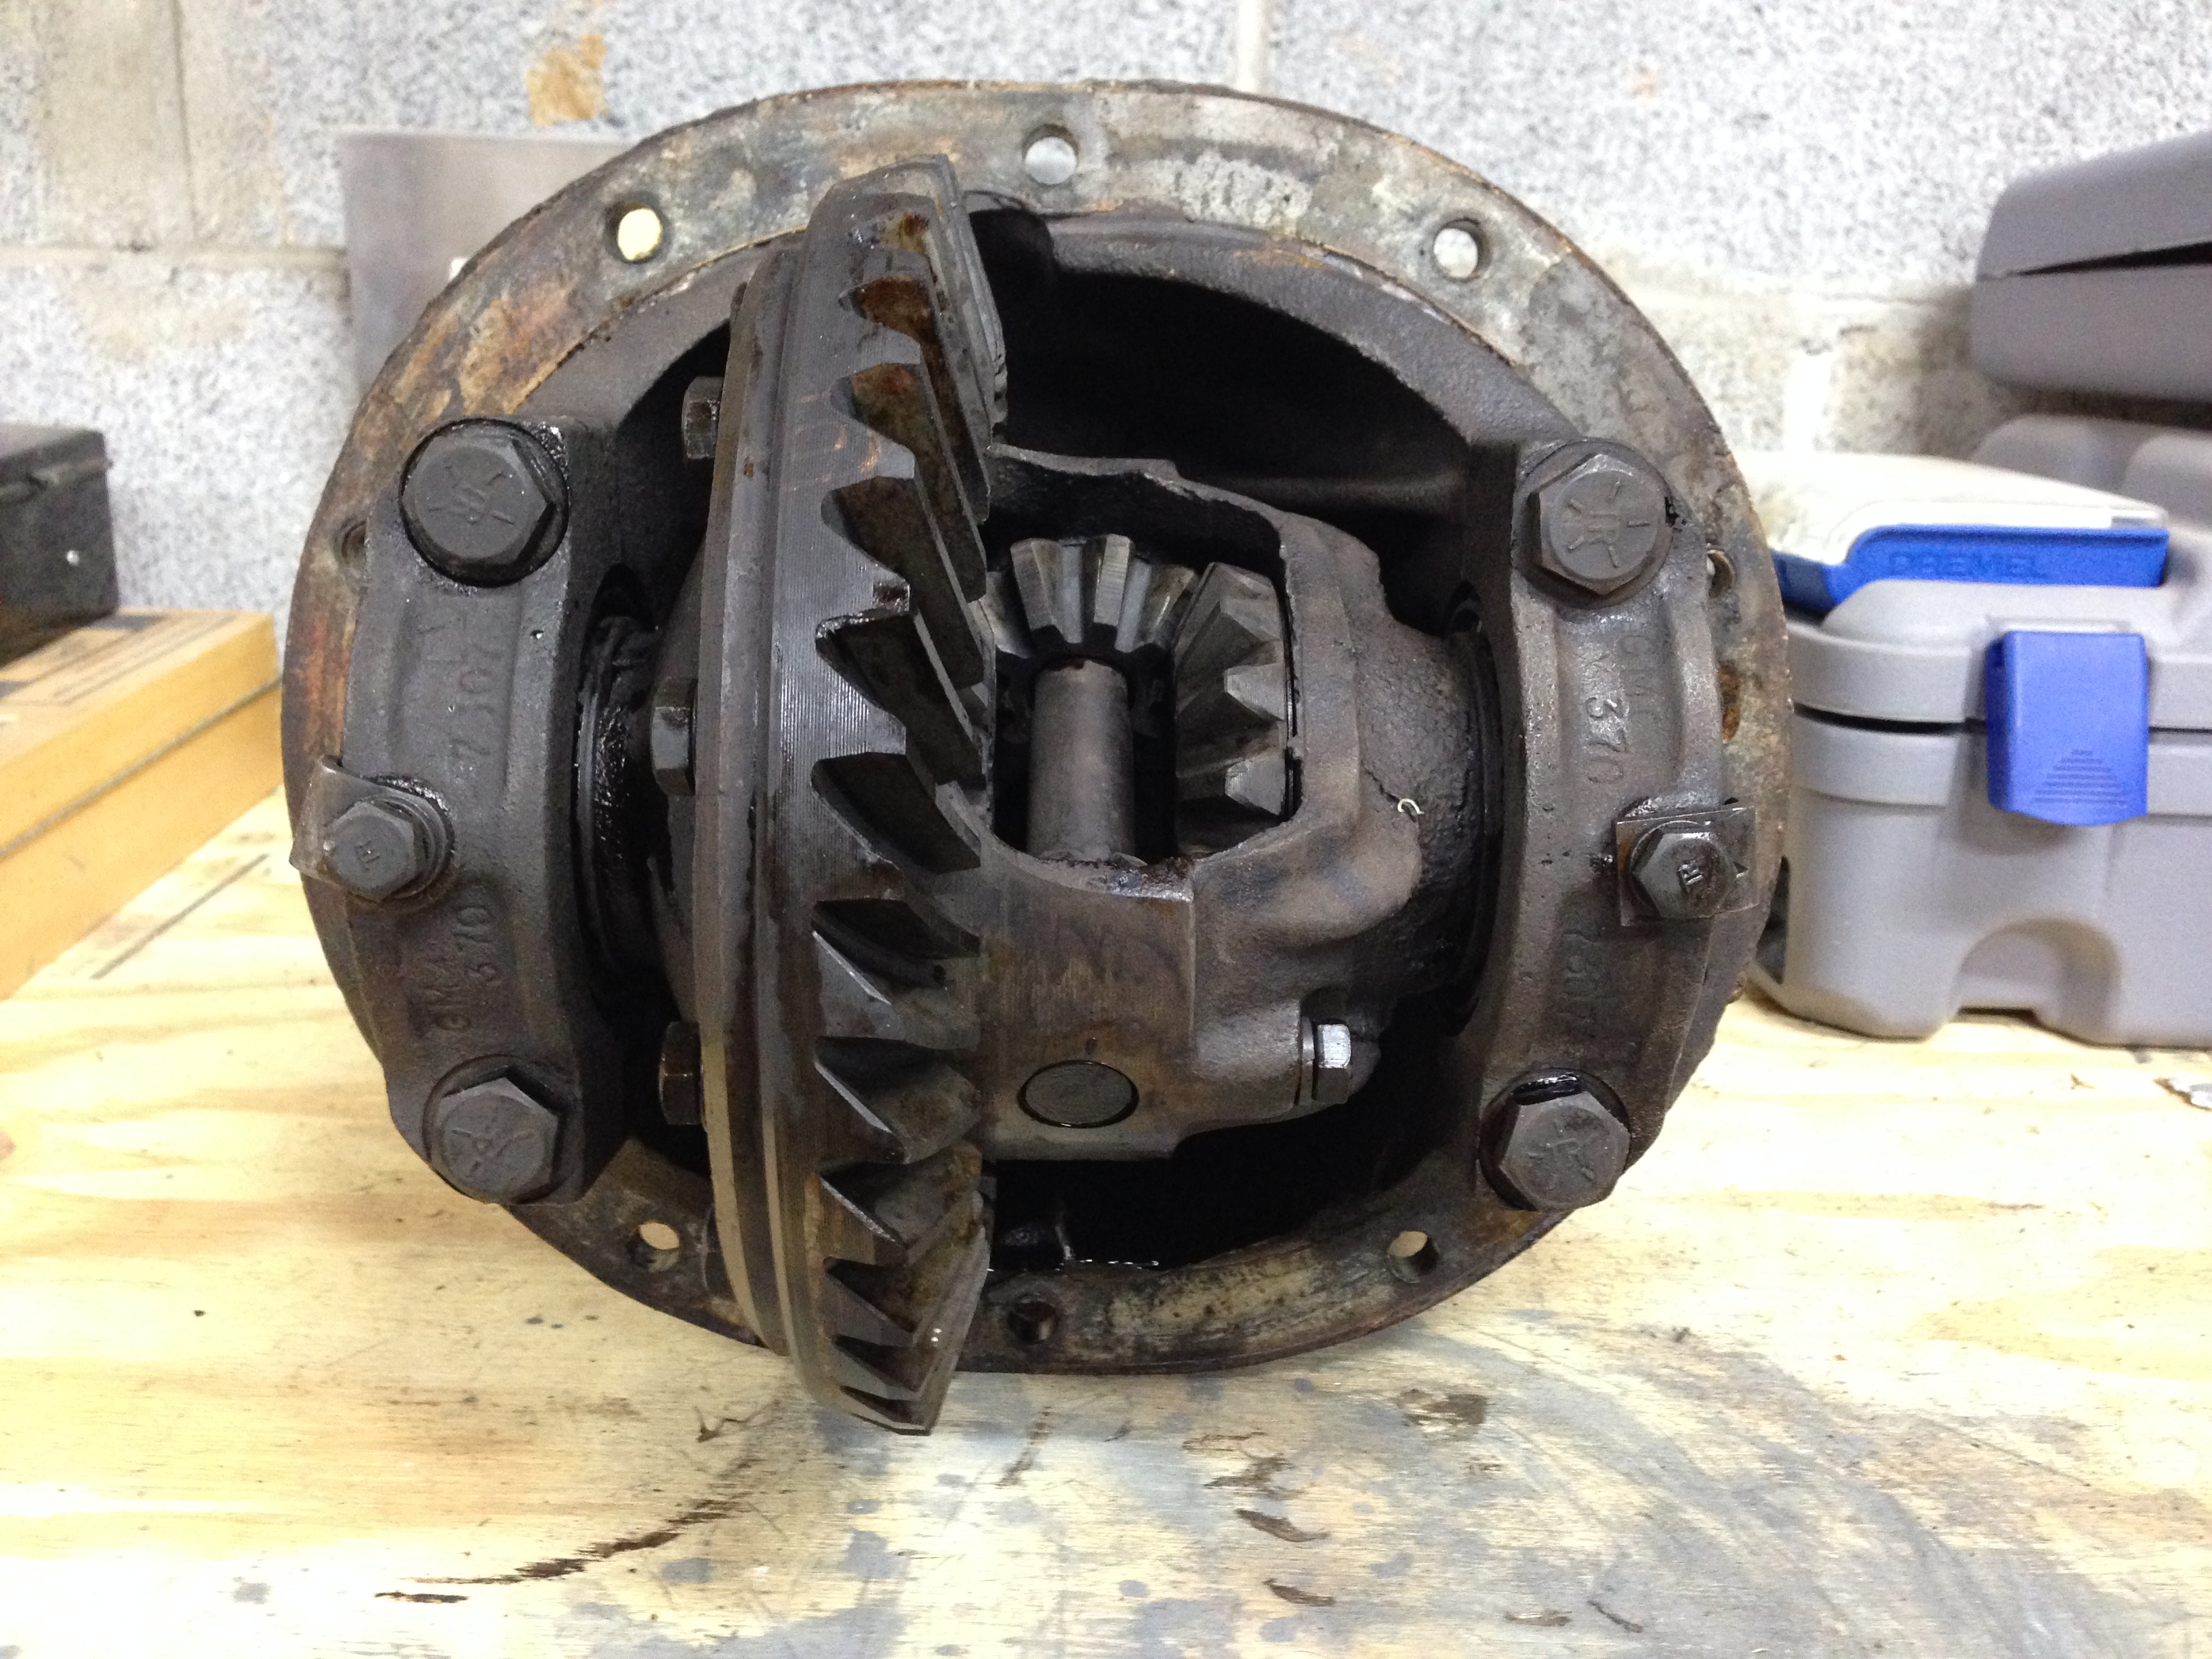
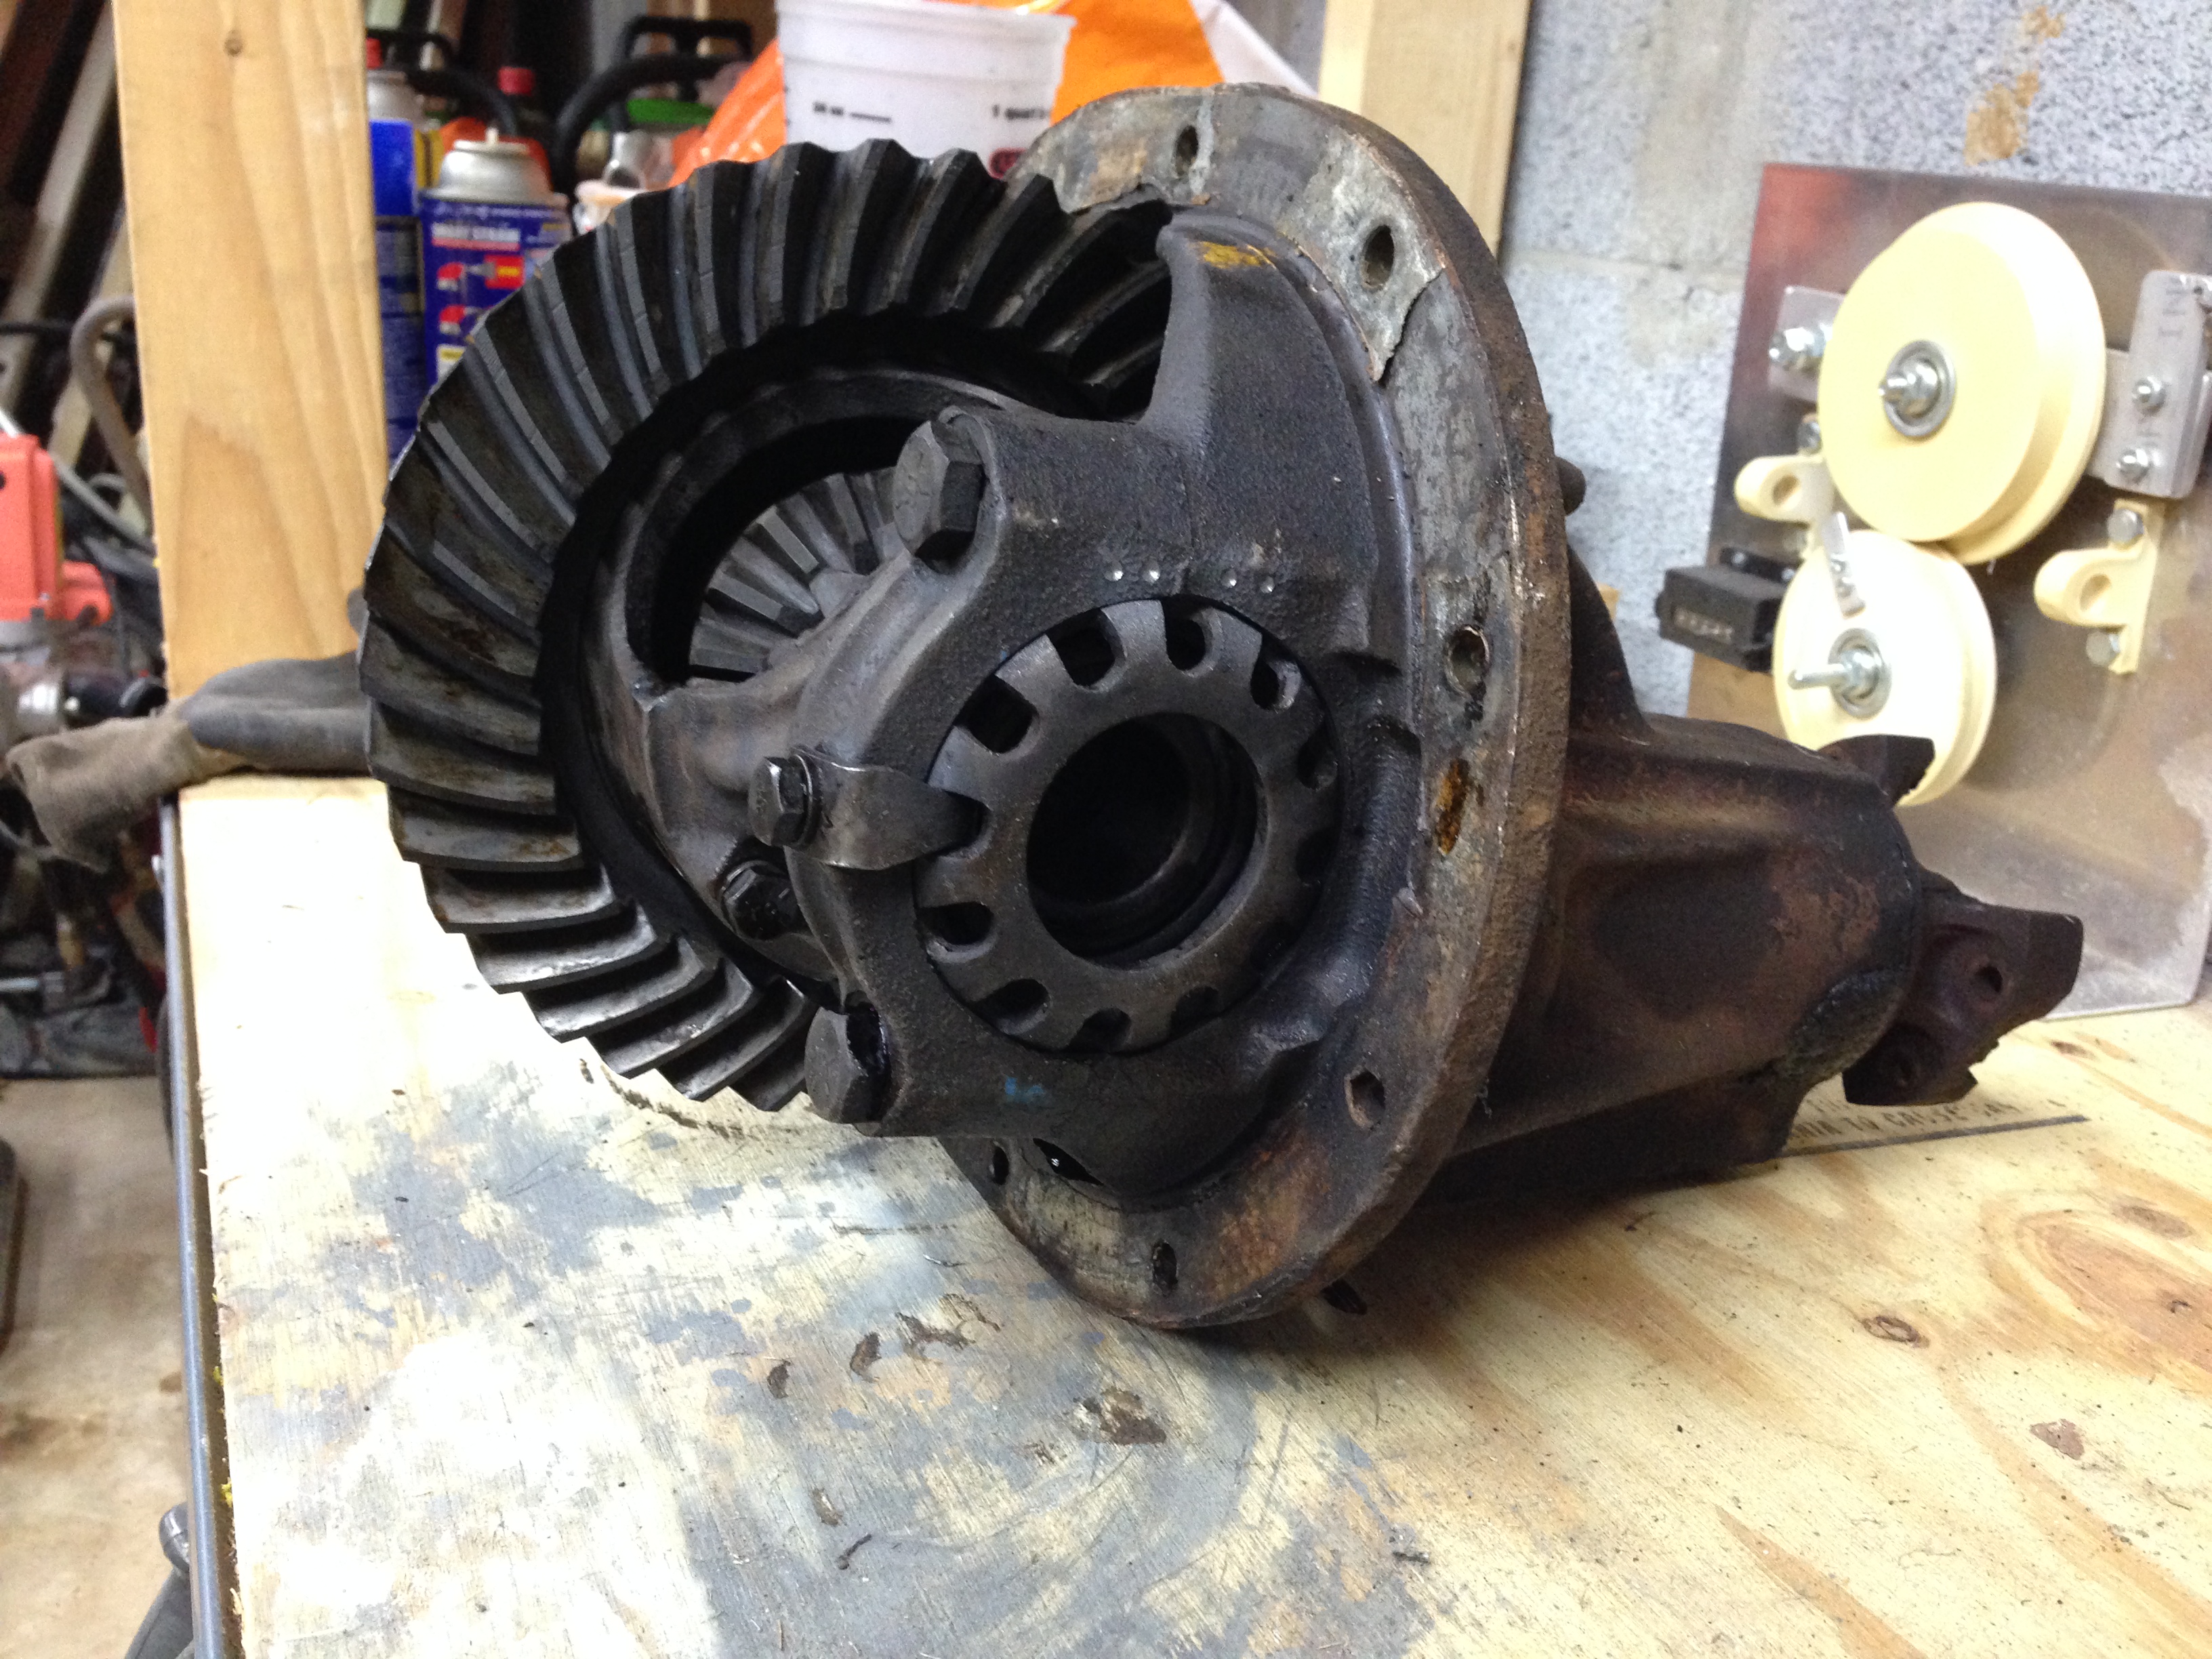
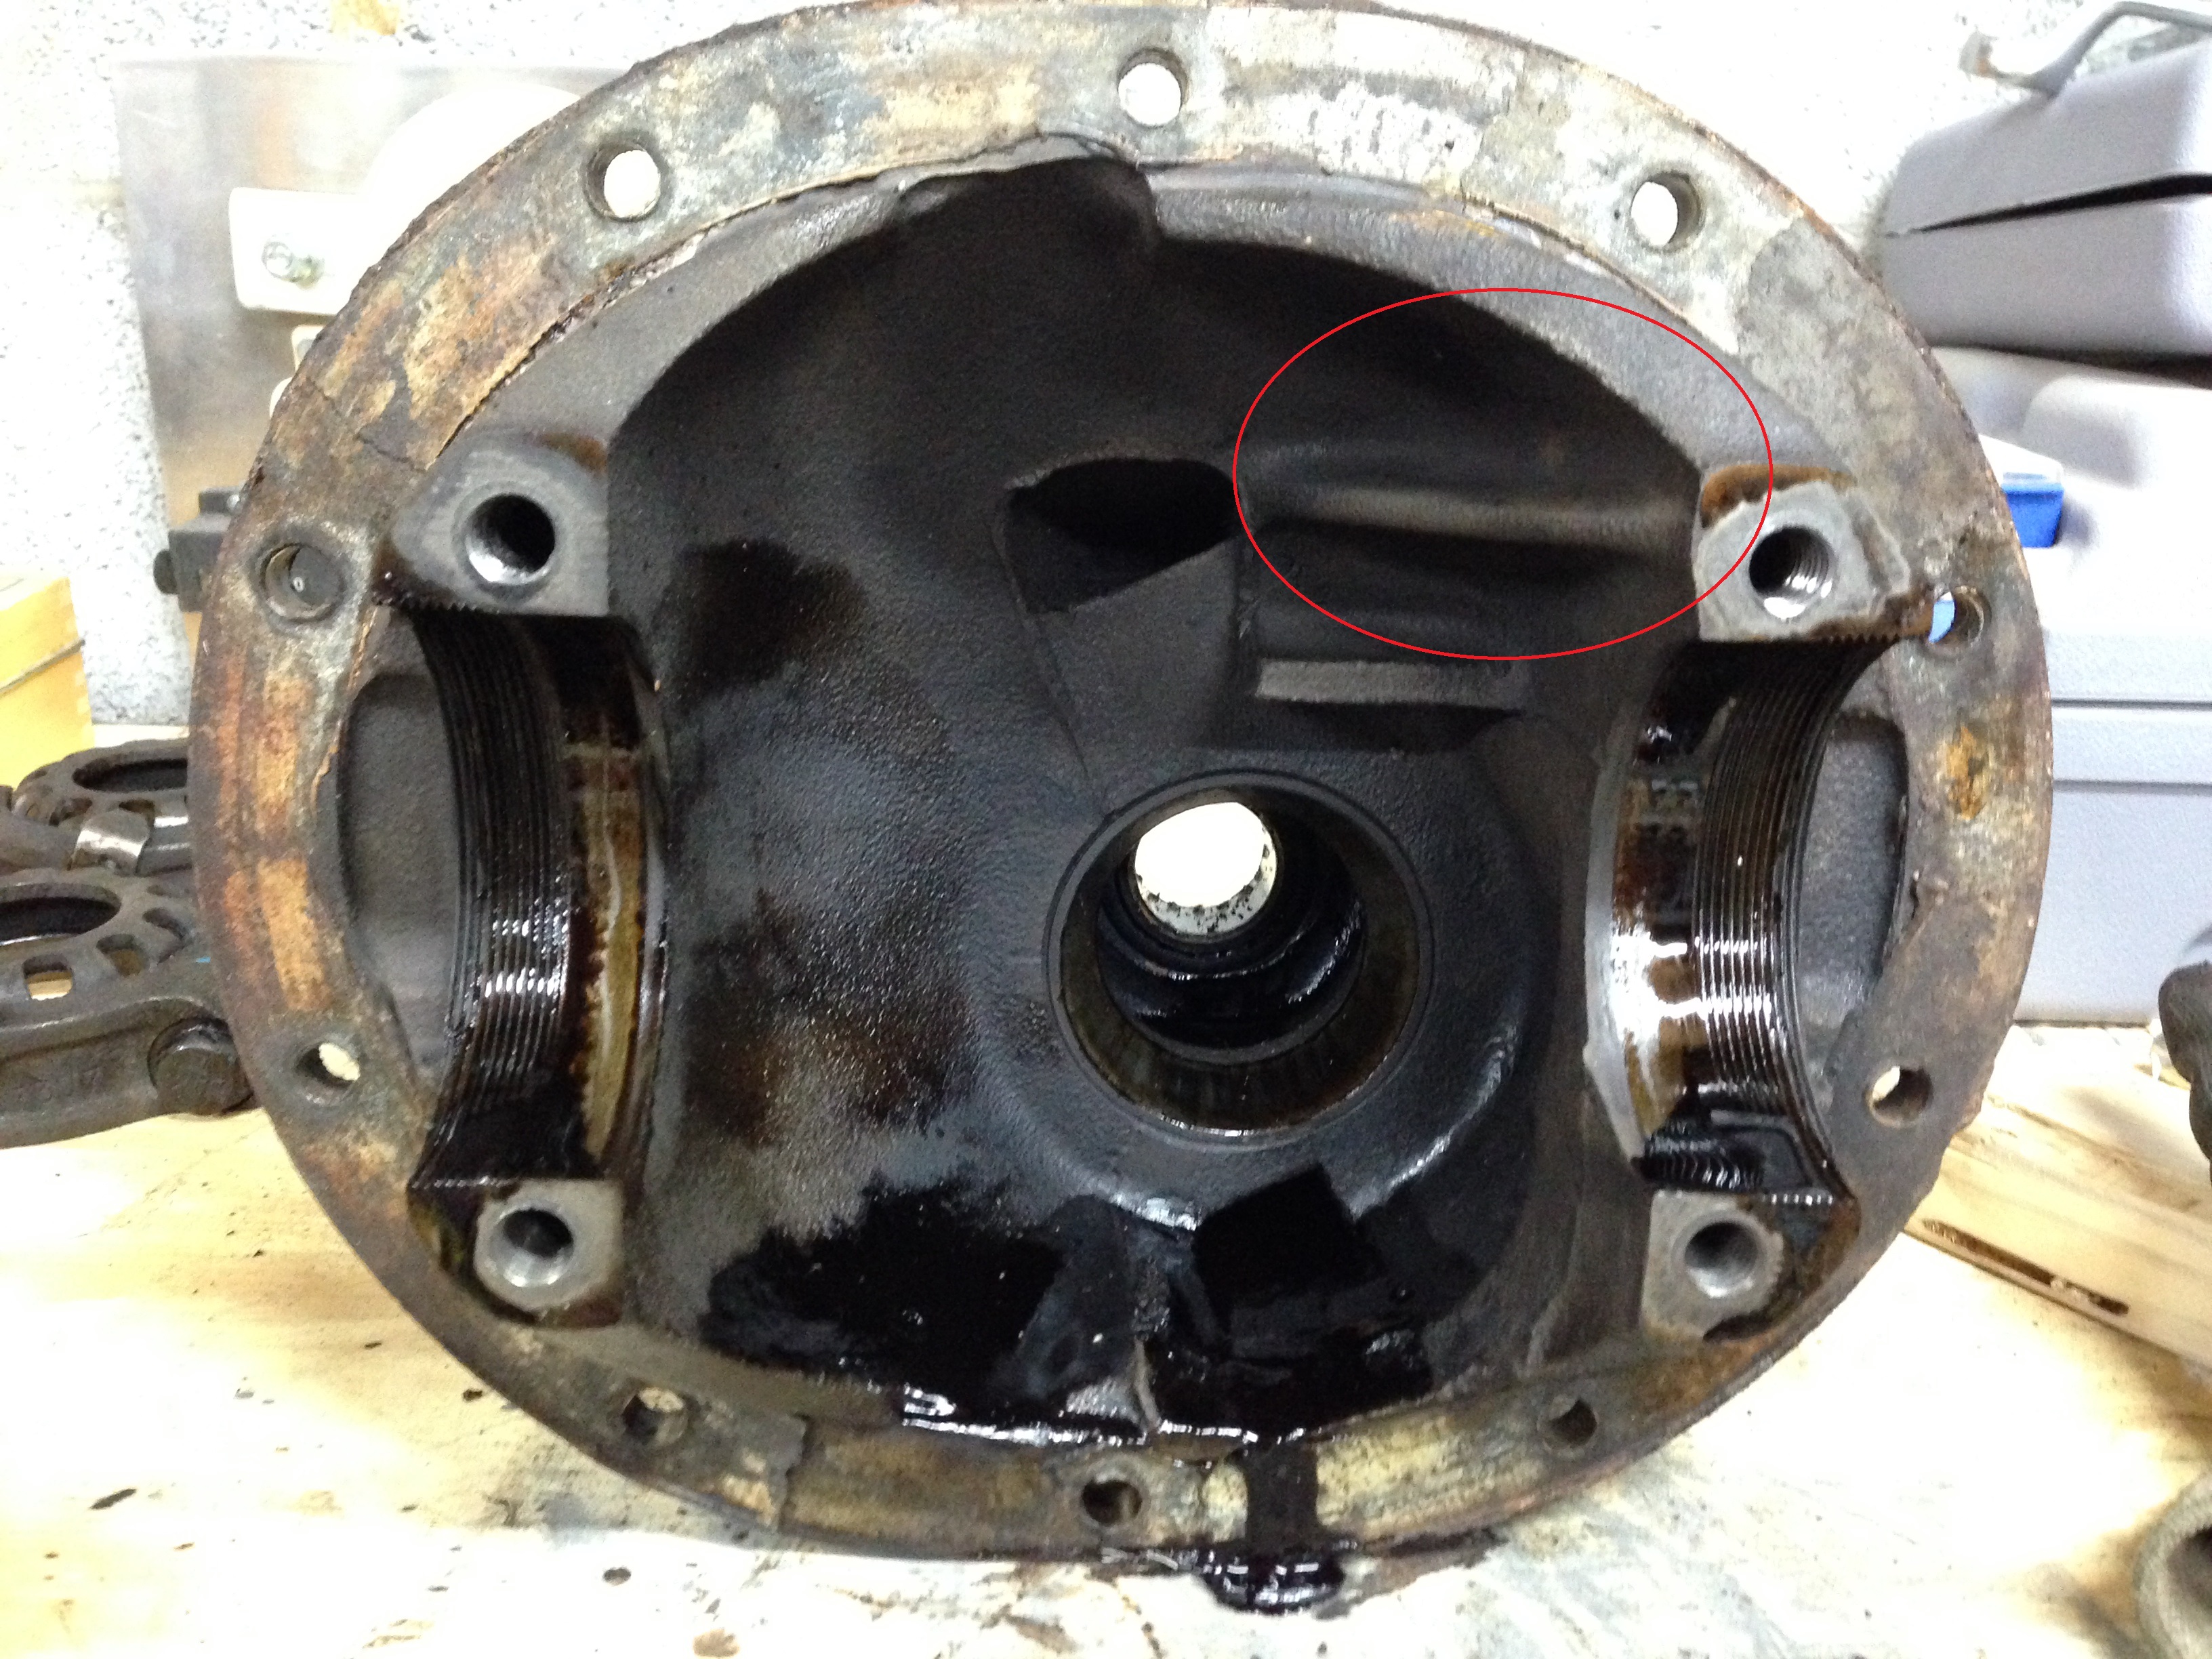
Head on view
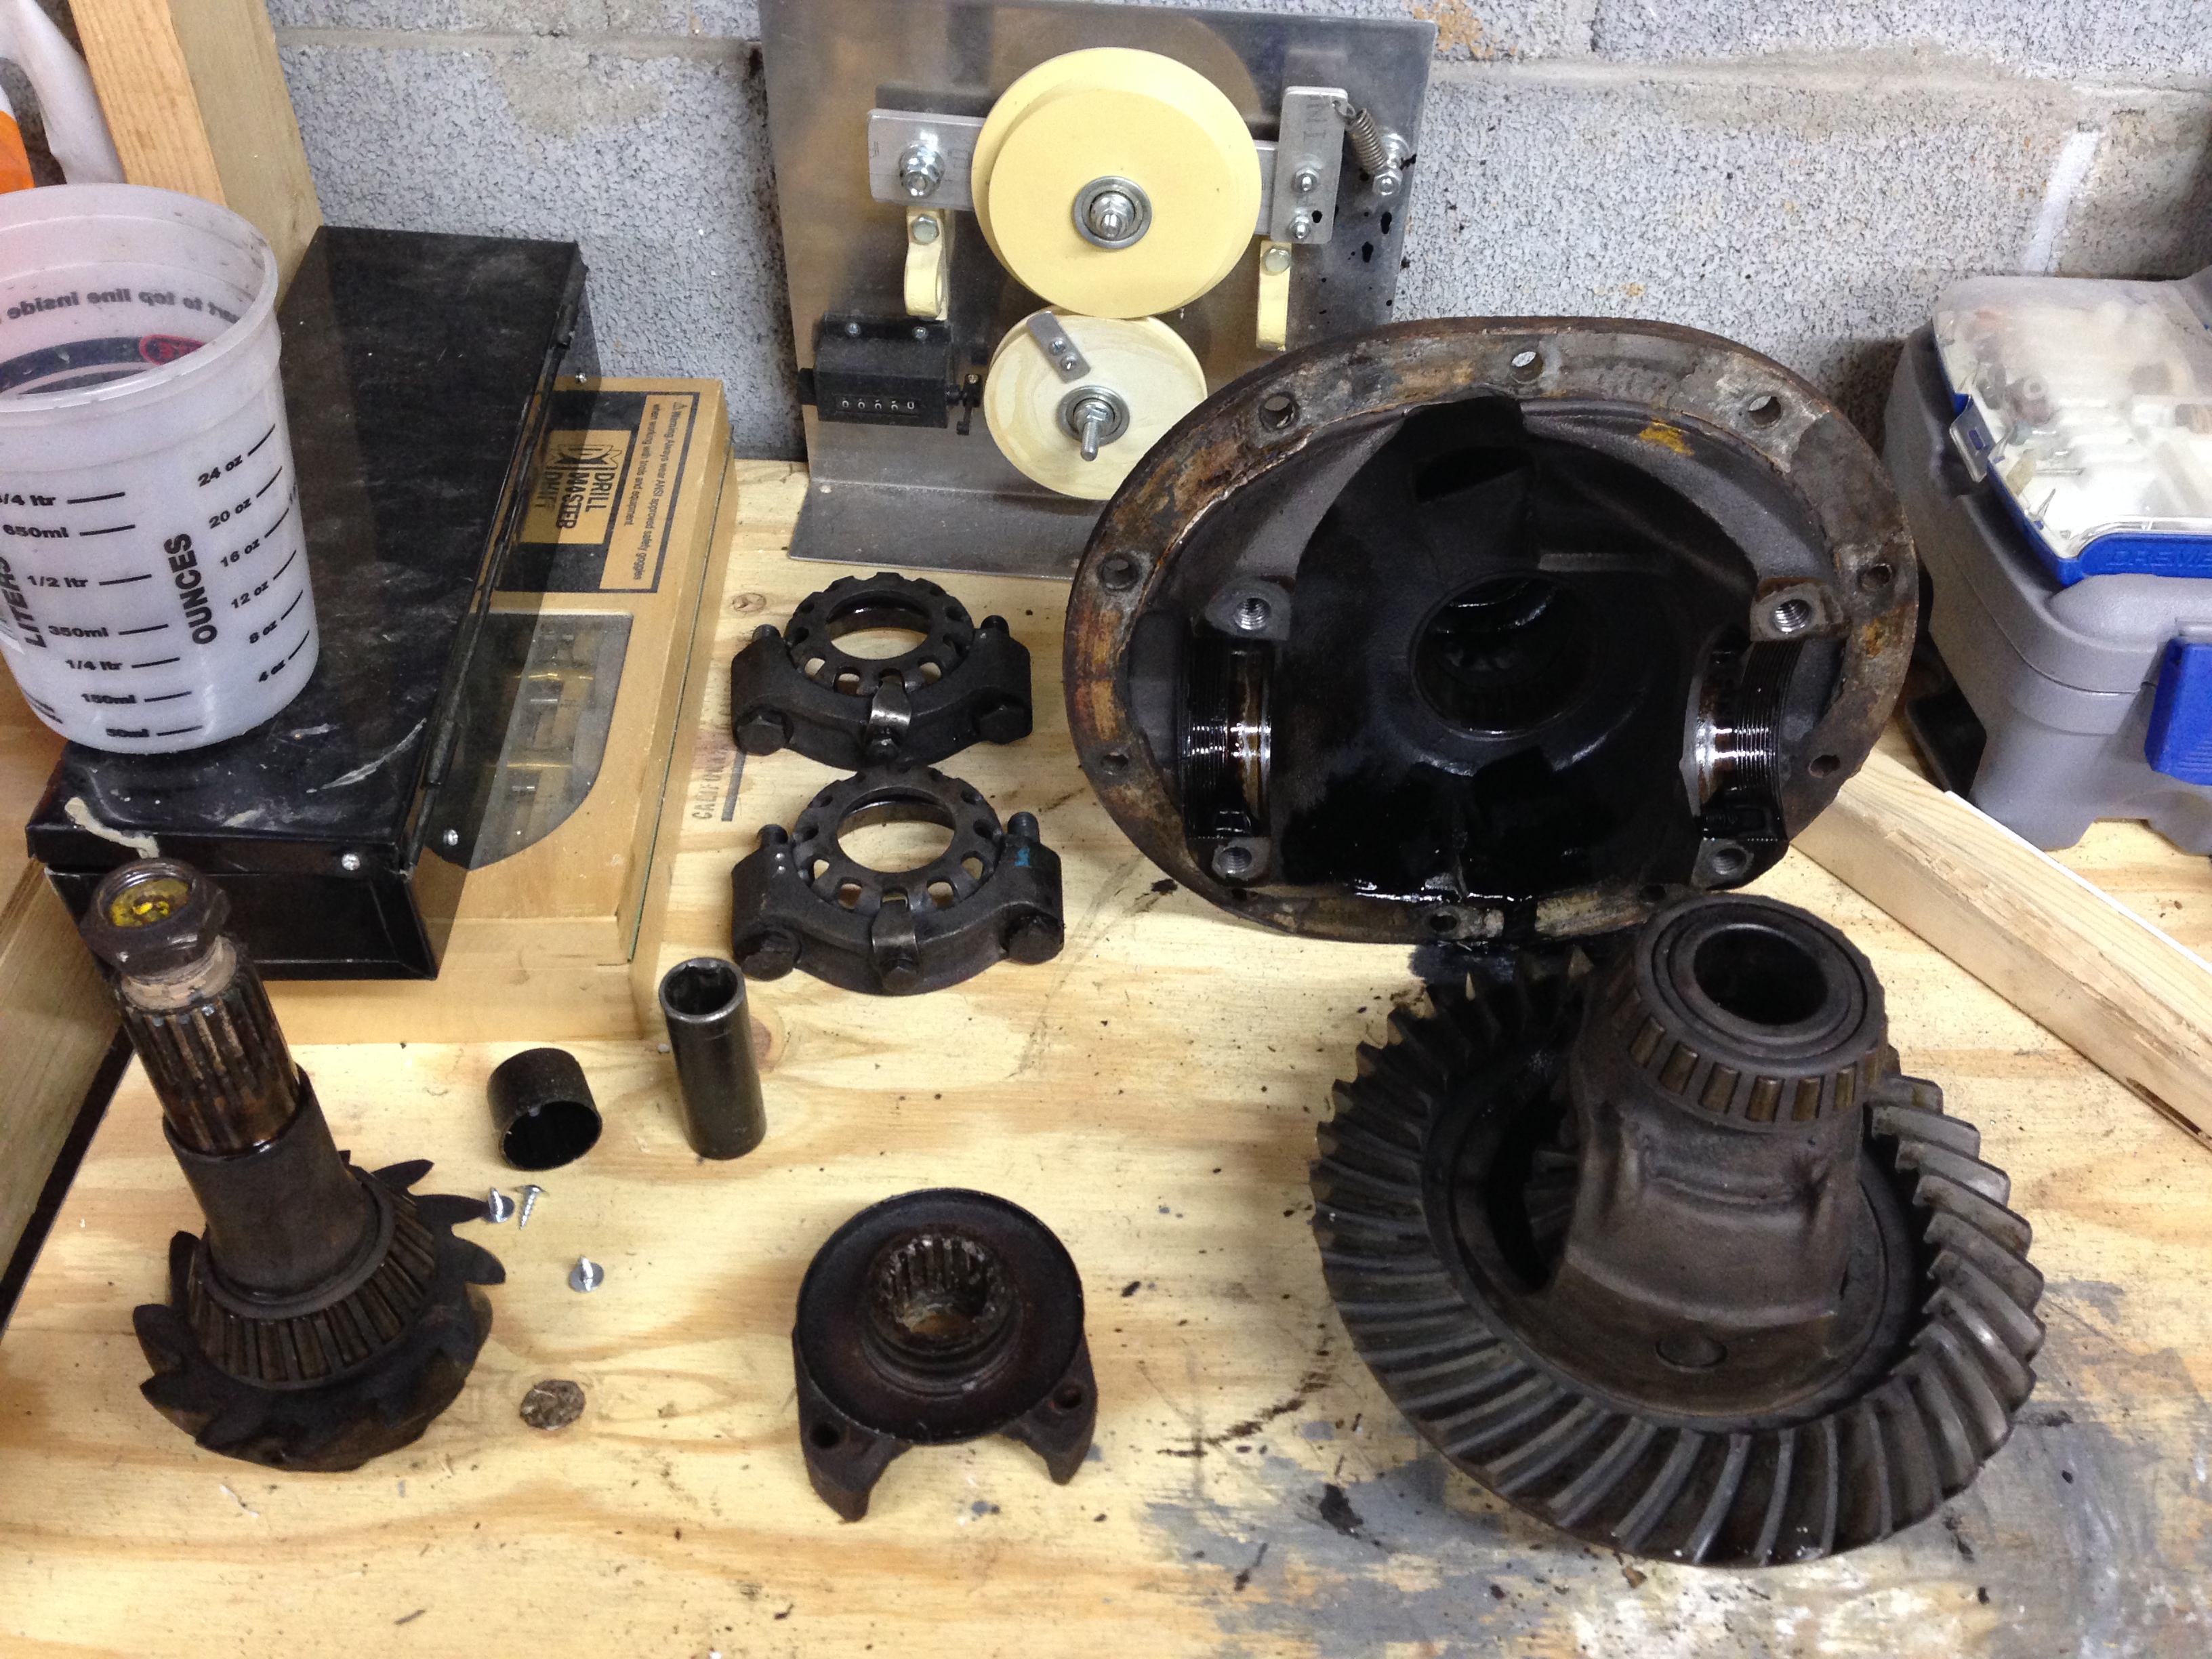
Disassembled Differential Carnage
The cases that contained open differentials were actually slightly different than those that contained their limited slip brethren. In order to make the new diff, I had to cut and grind out a piece of enforcing gusset. The before is a little hard to see, but I think you’ll get the picture.
Gusset in place
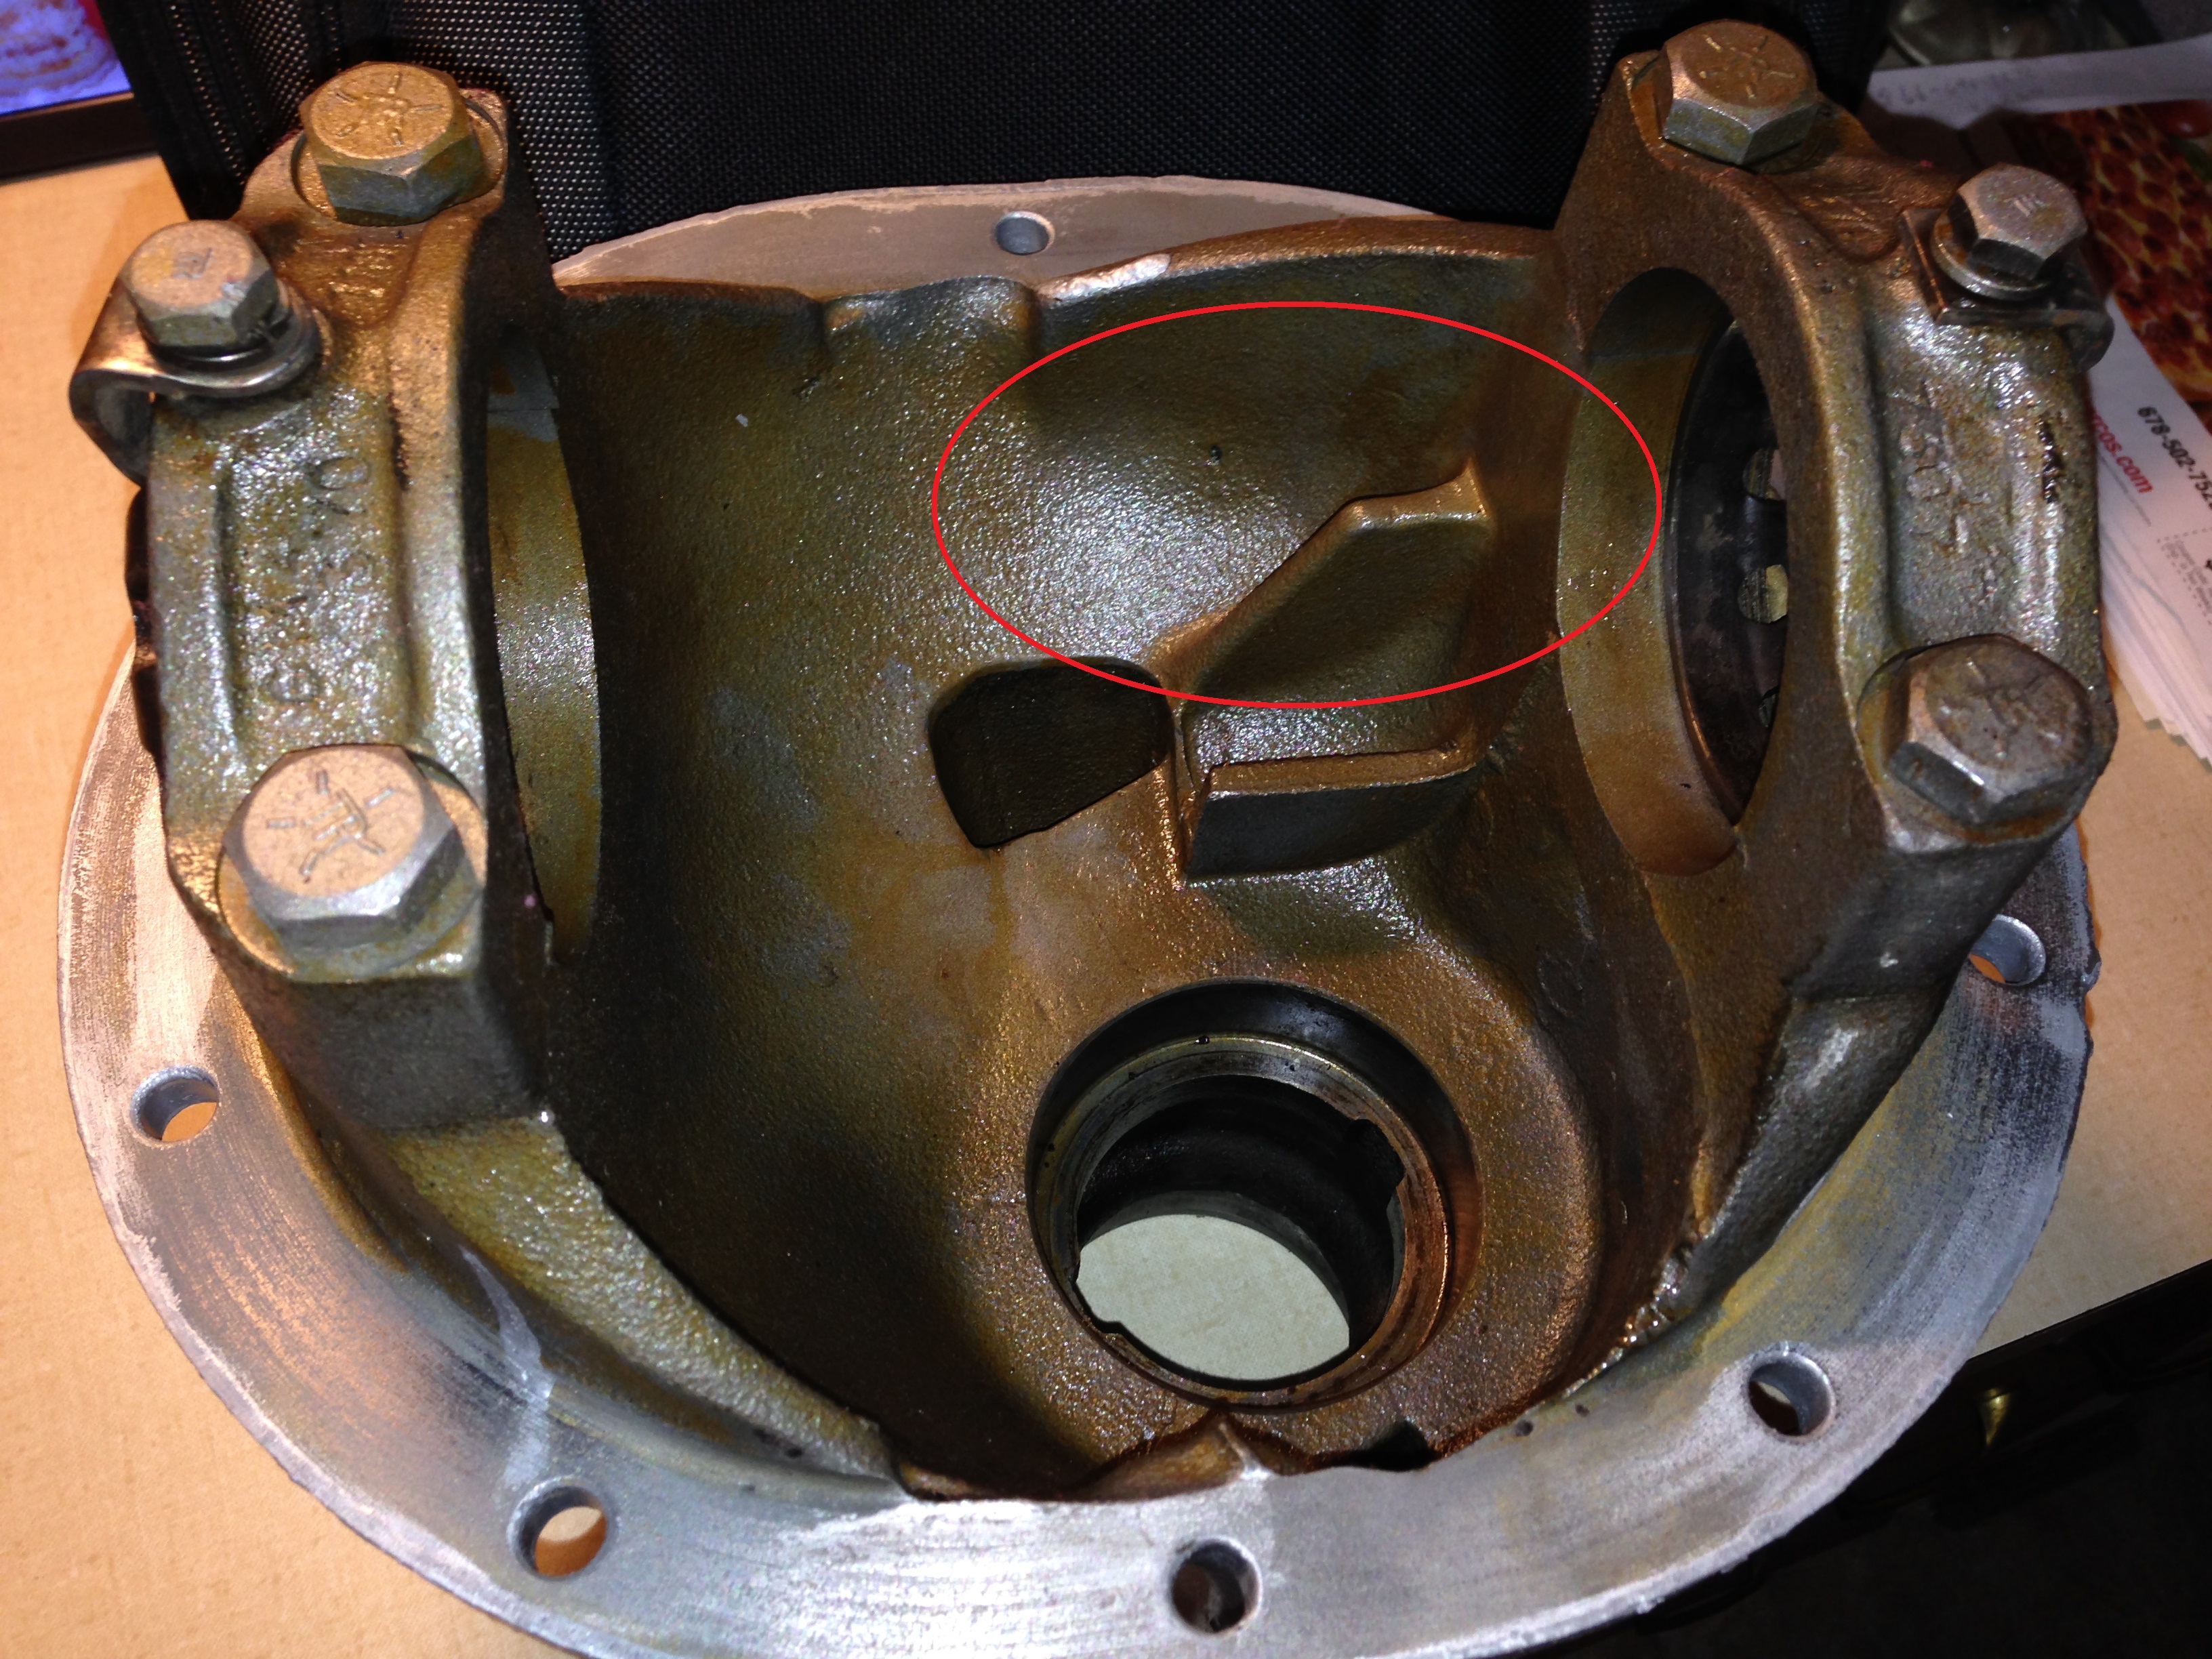
Gusset cut and ground out
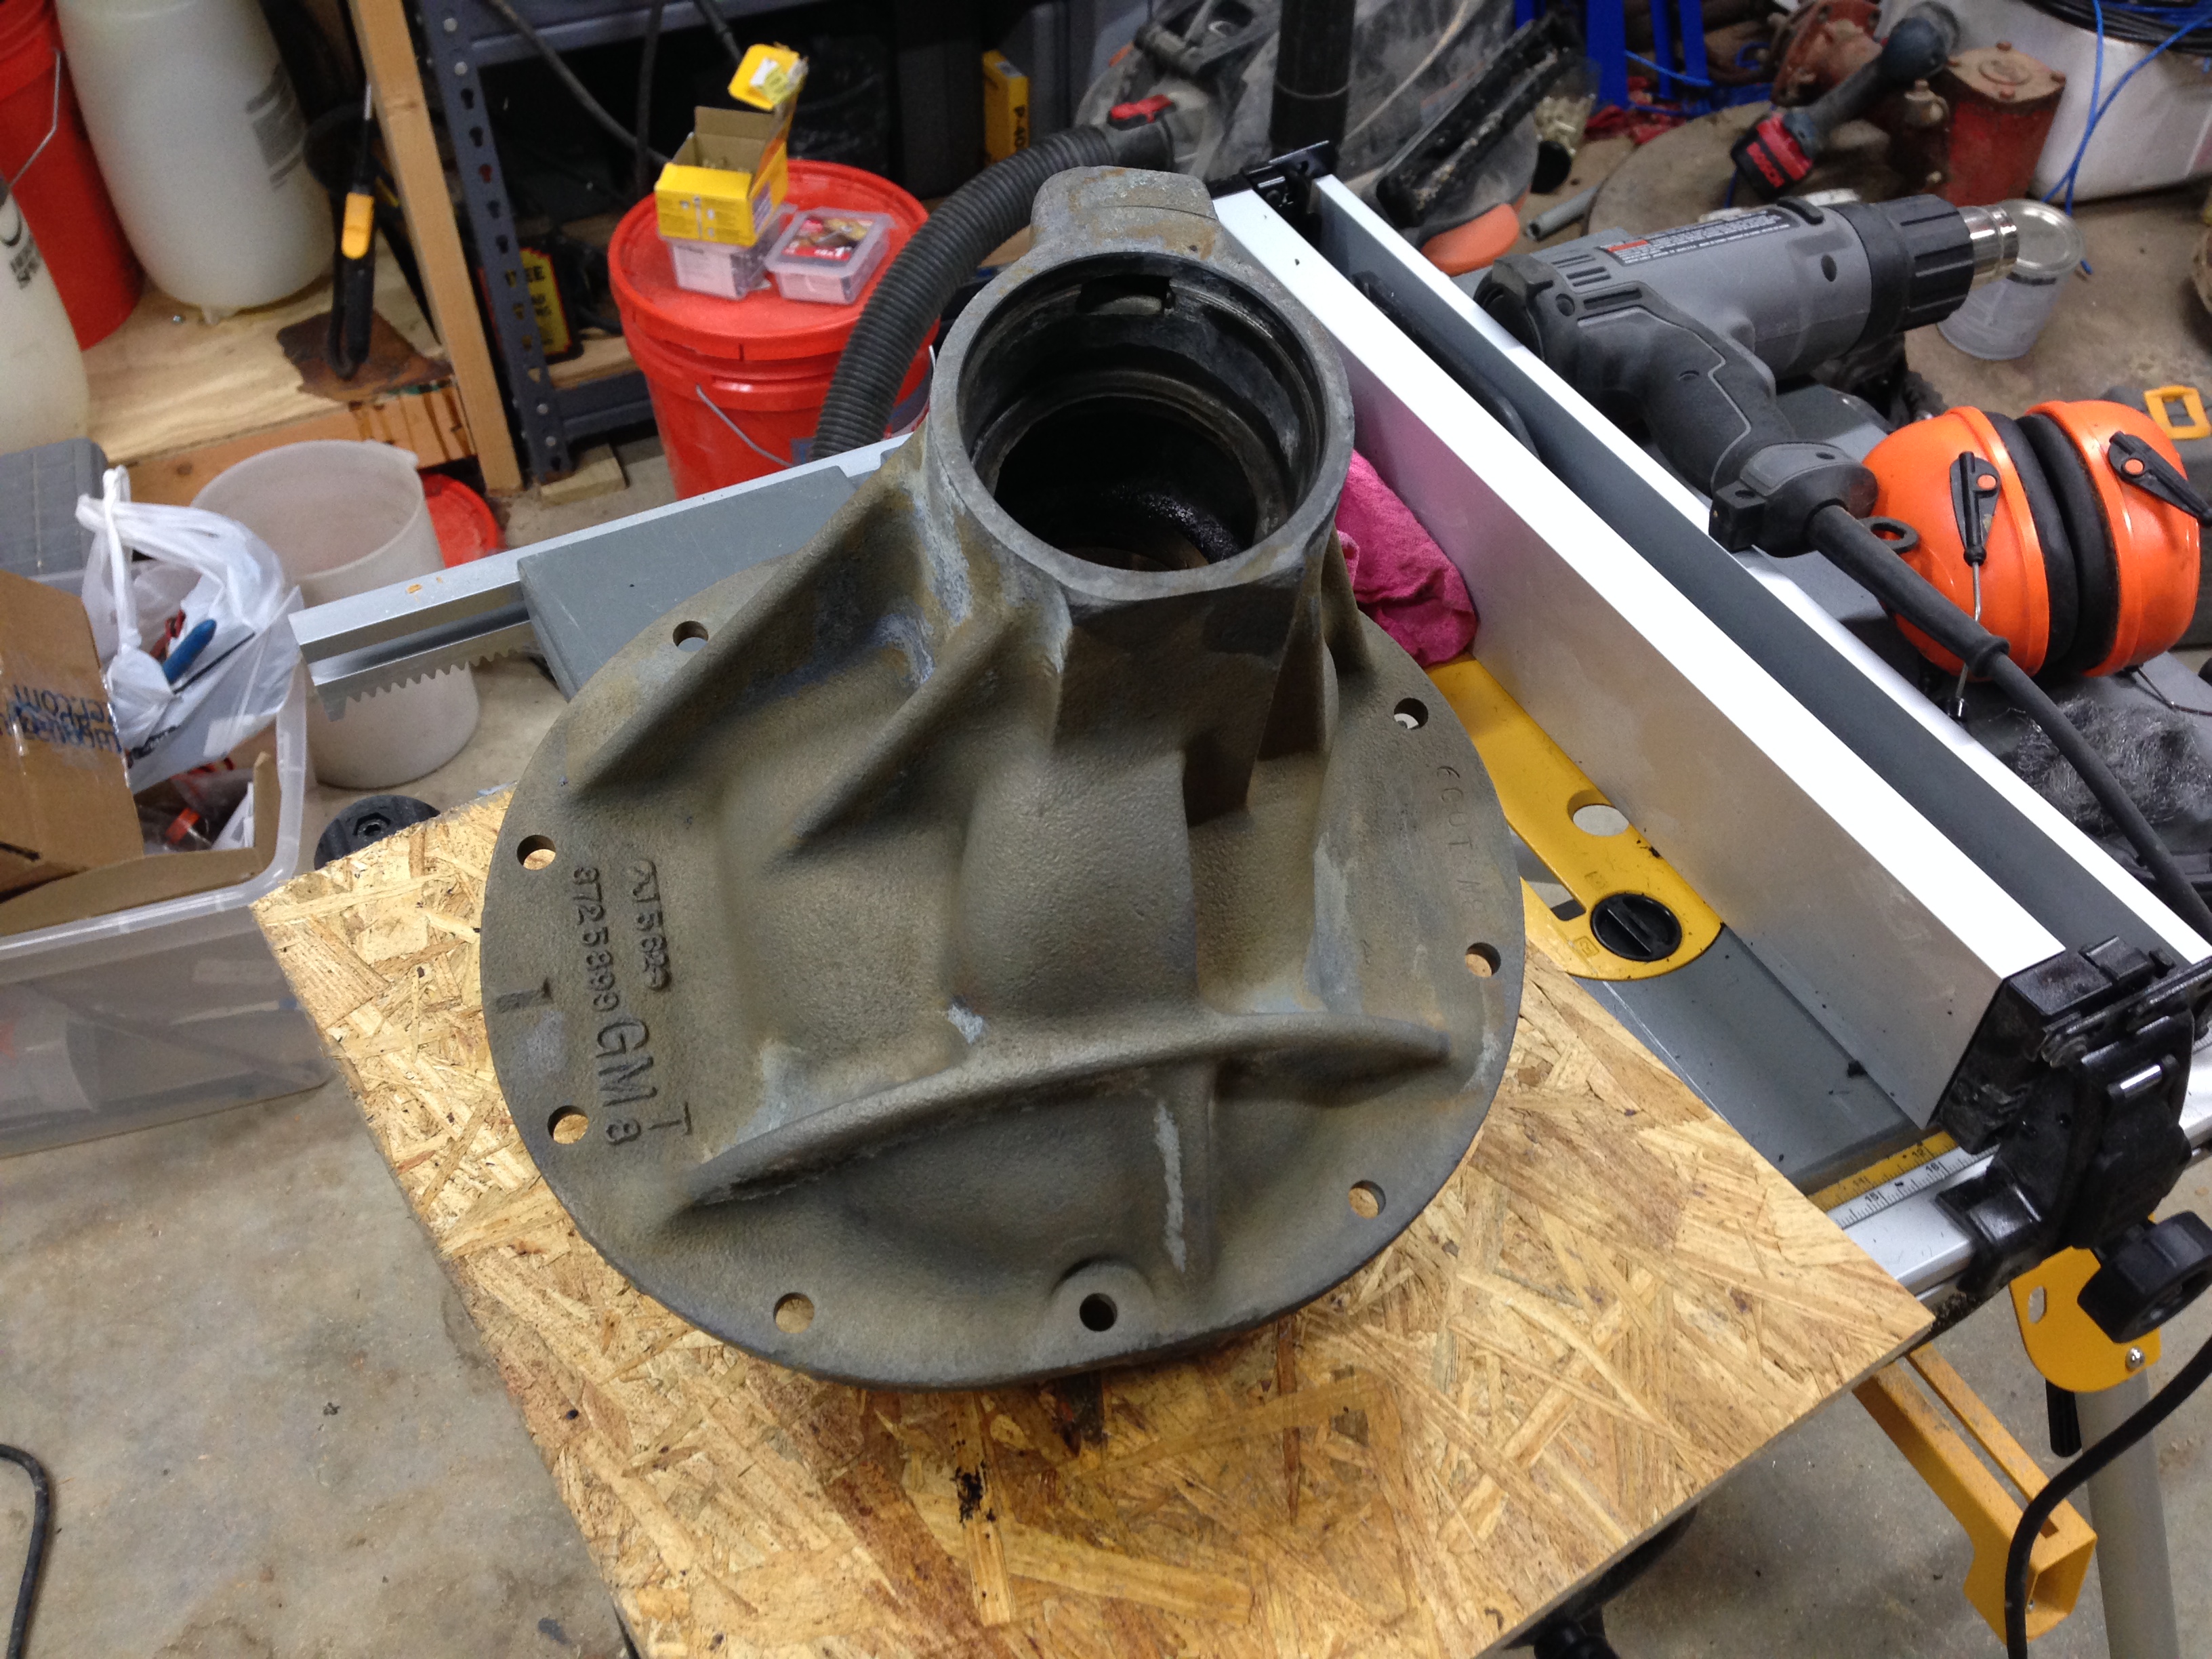
Differential case after blasting it clean

Fresh coat of paint
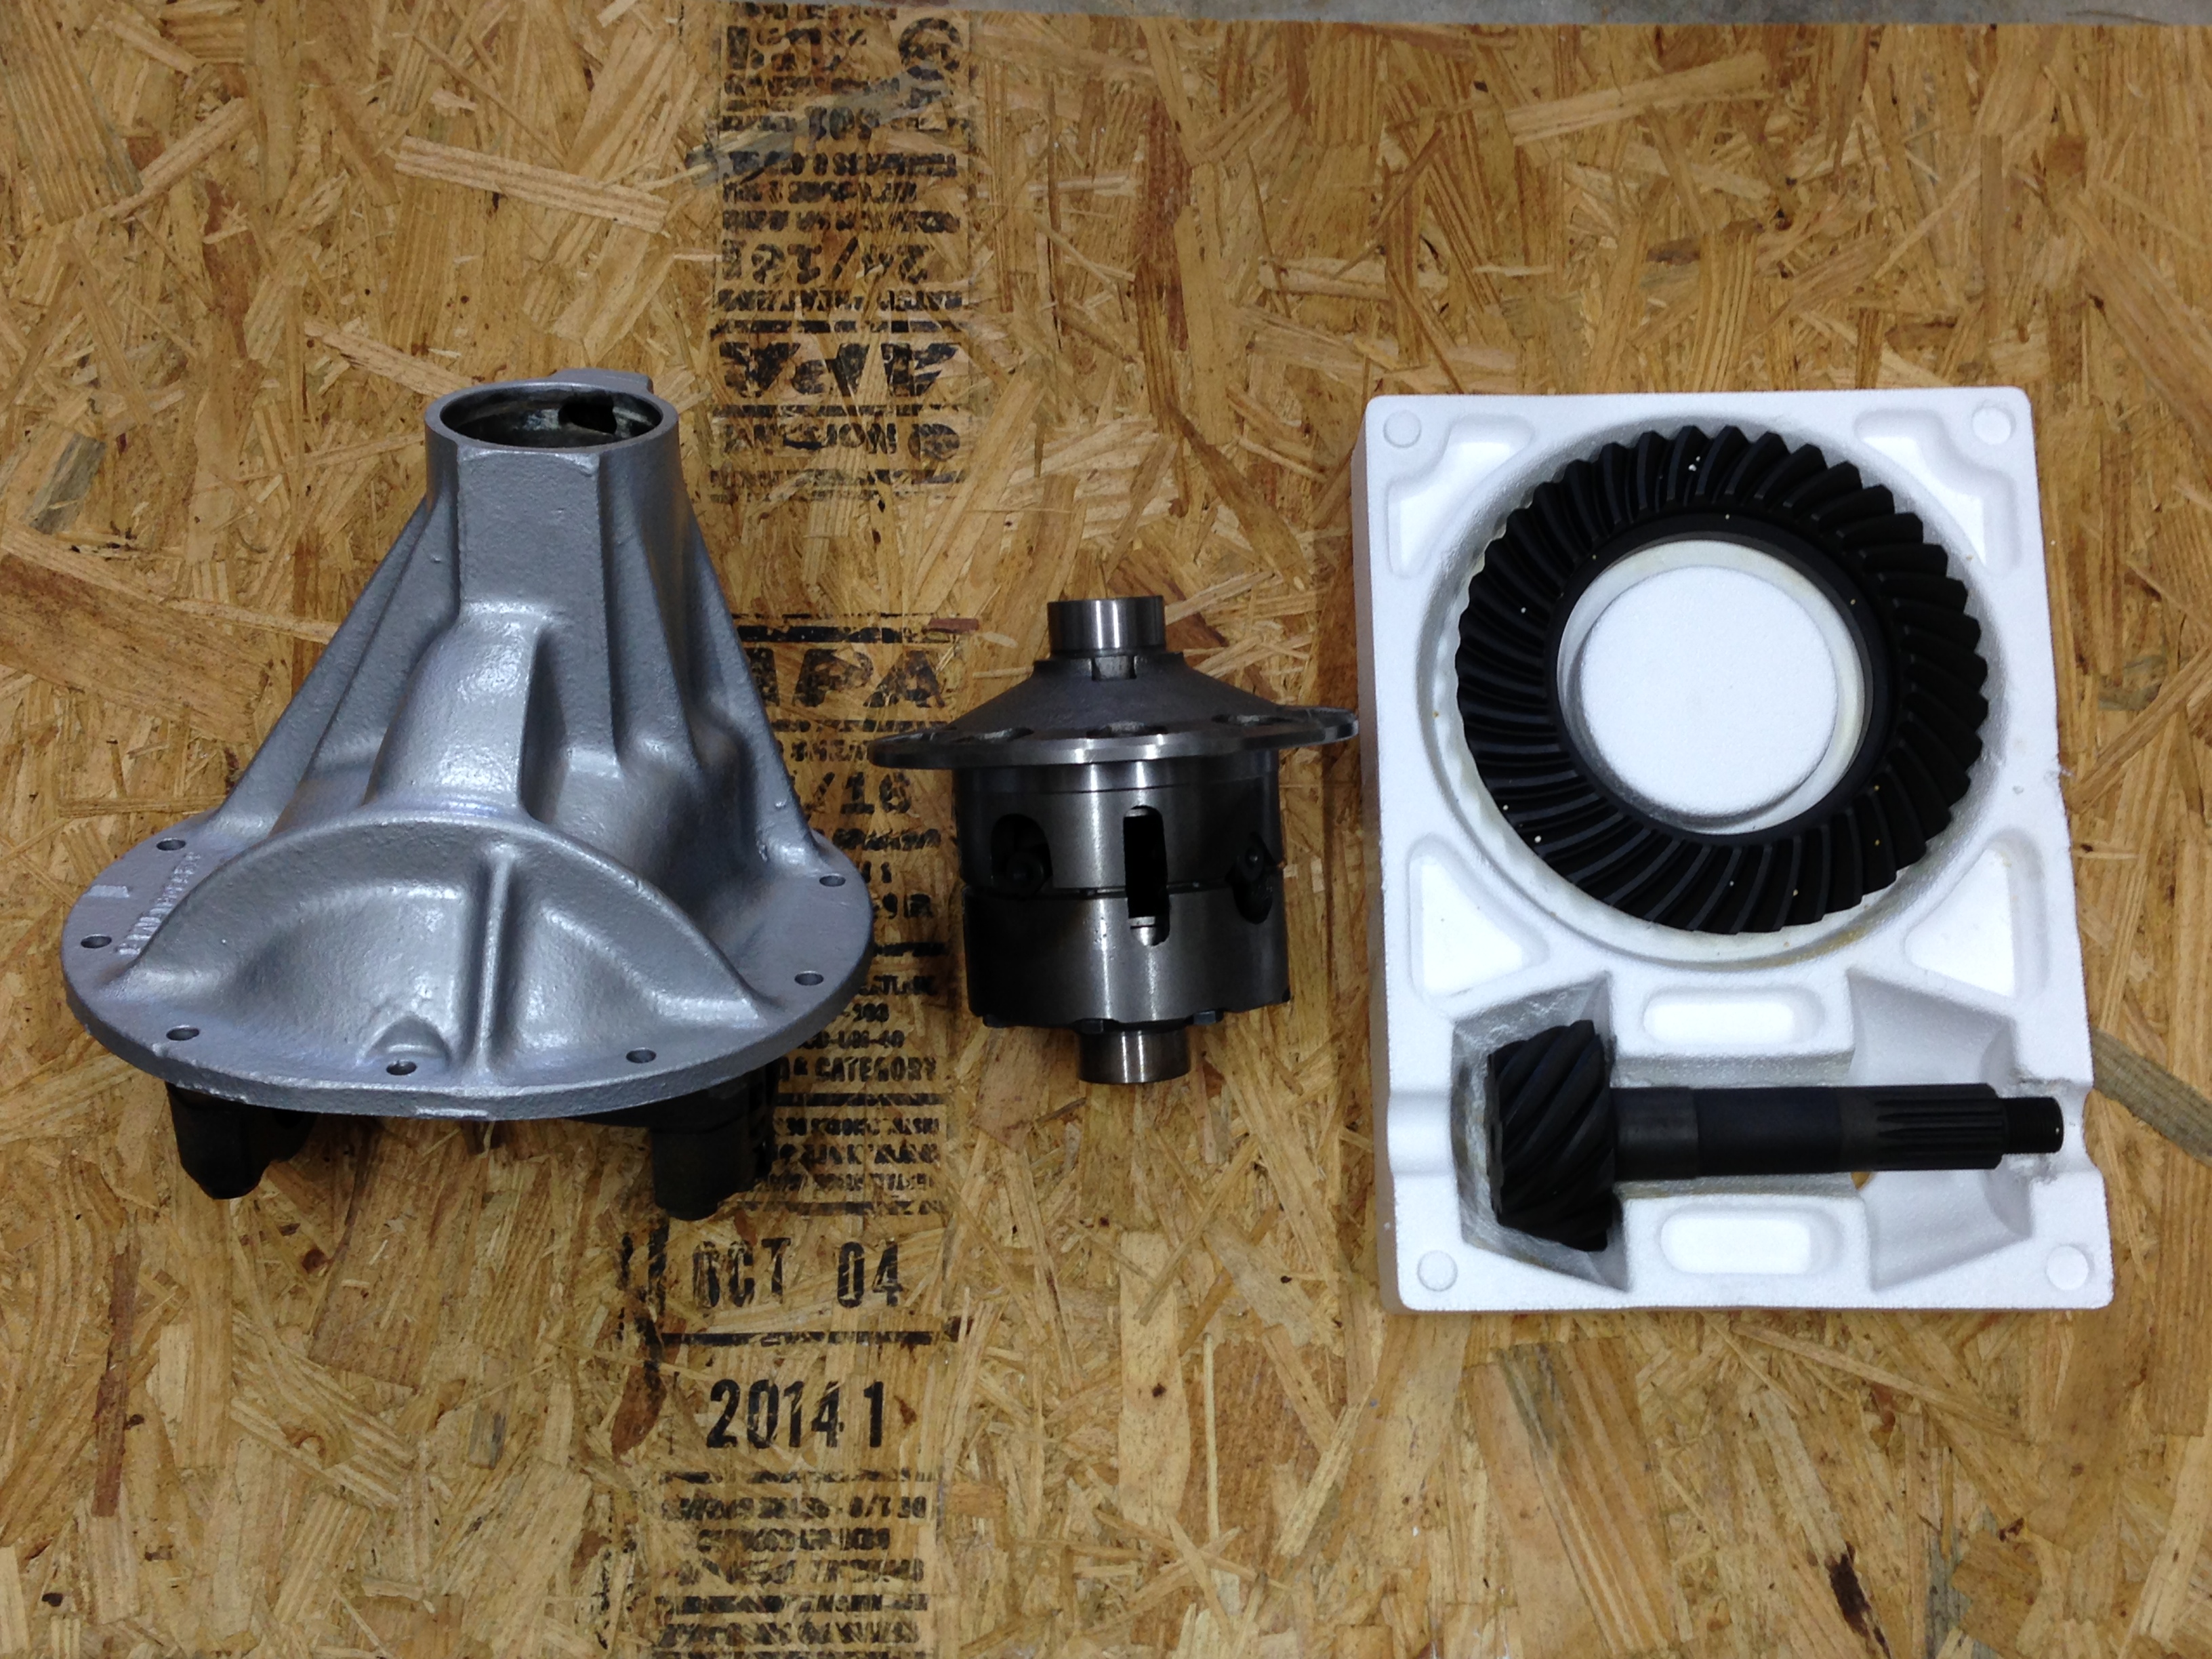
Case, Differential, Ring and Pinion awaiting assembly
Now, putting all this stuff back together is a finicky business that requires tools and knowledge that I don’t have. All of the tolerances must be set correctly and if they’re not, you can be in big trouble. So, off to the drivetrain shop it all went. When it came back it looked like this.
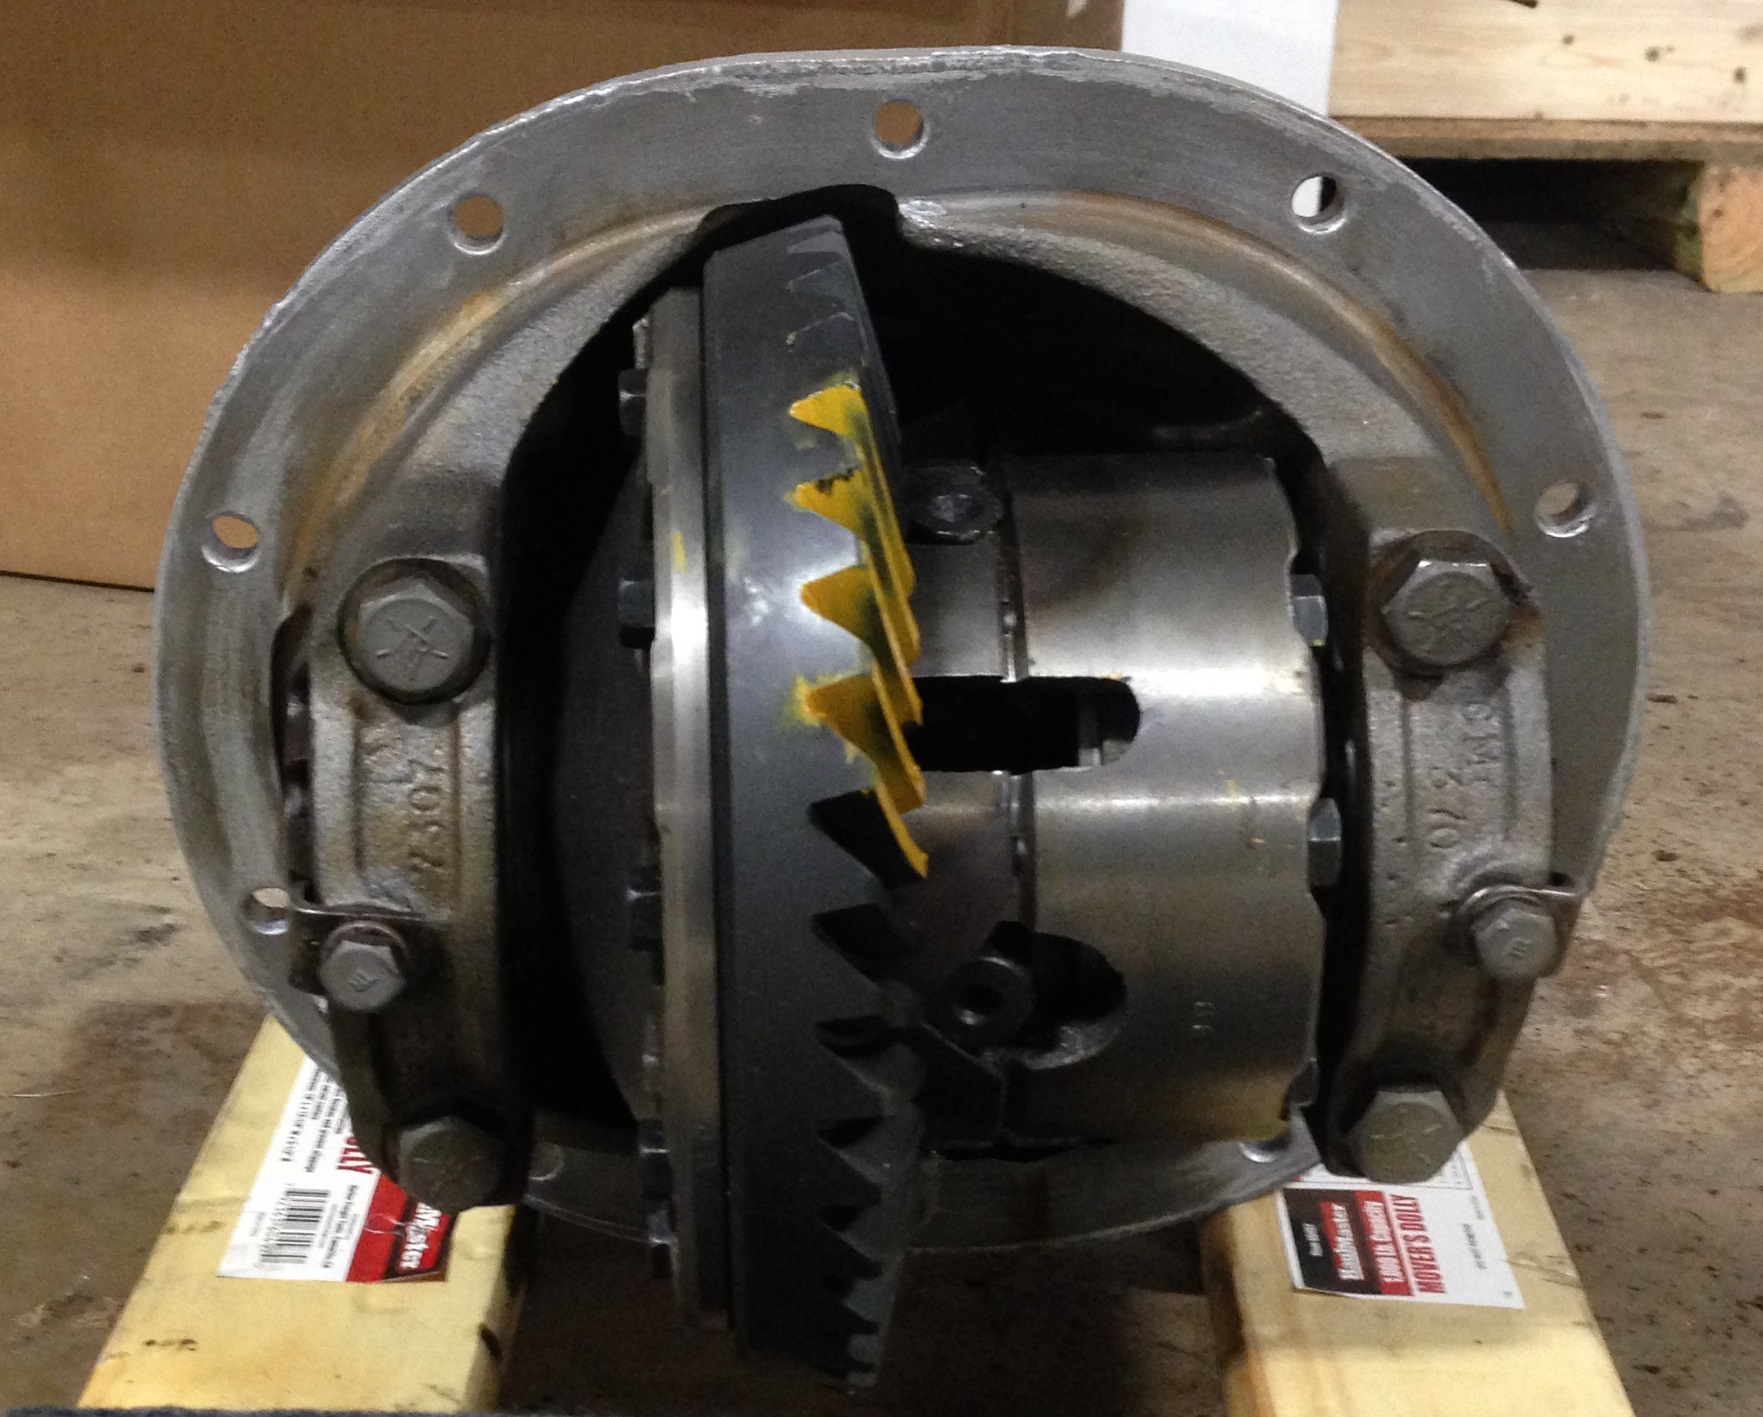
Sexy, huh?
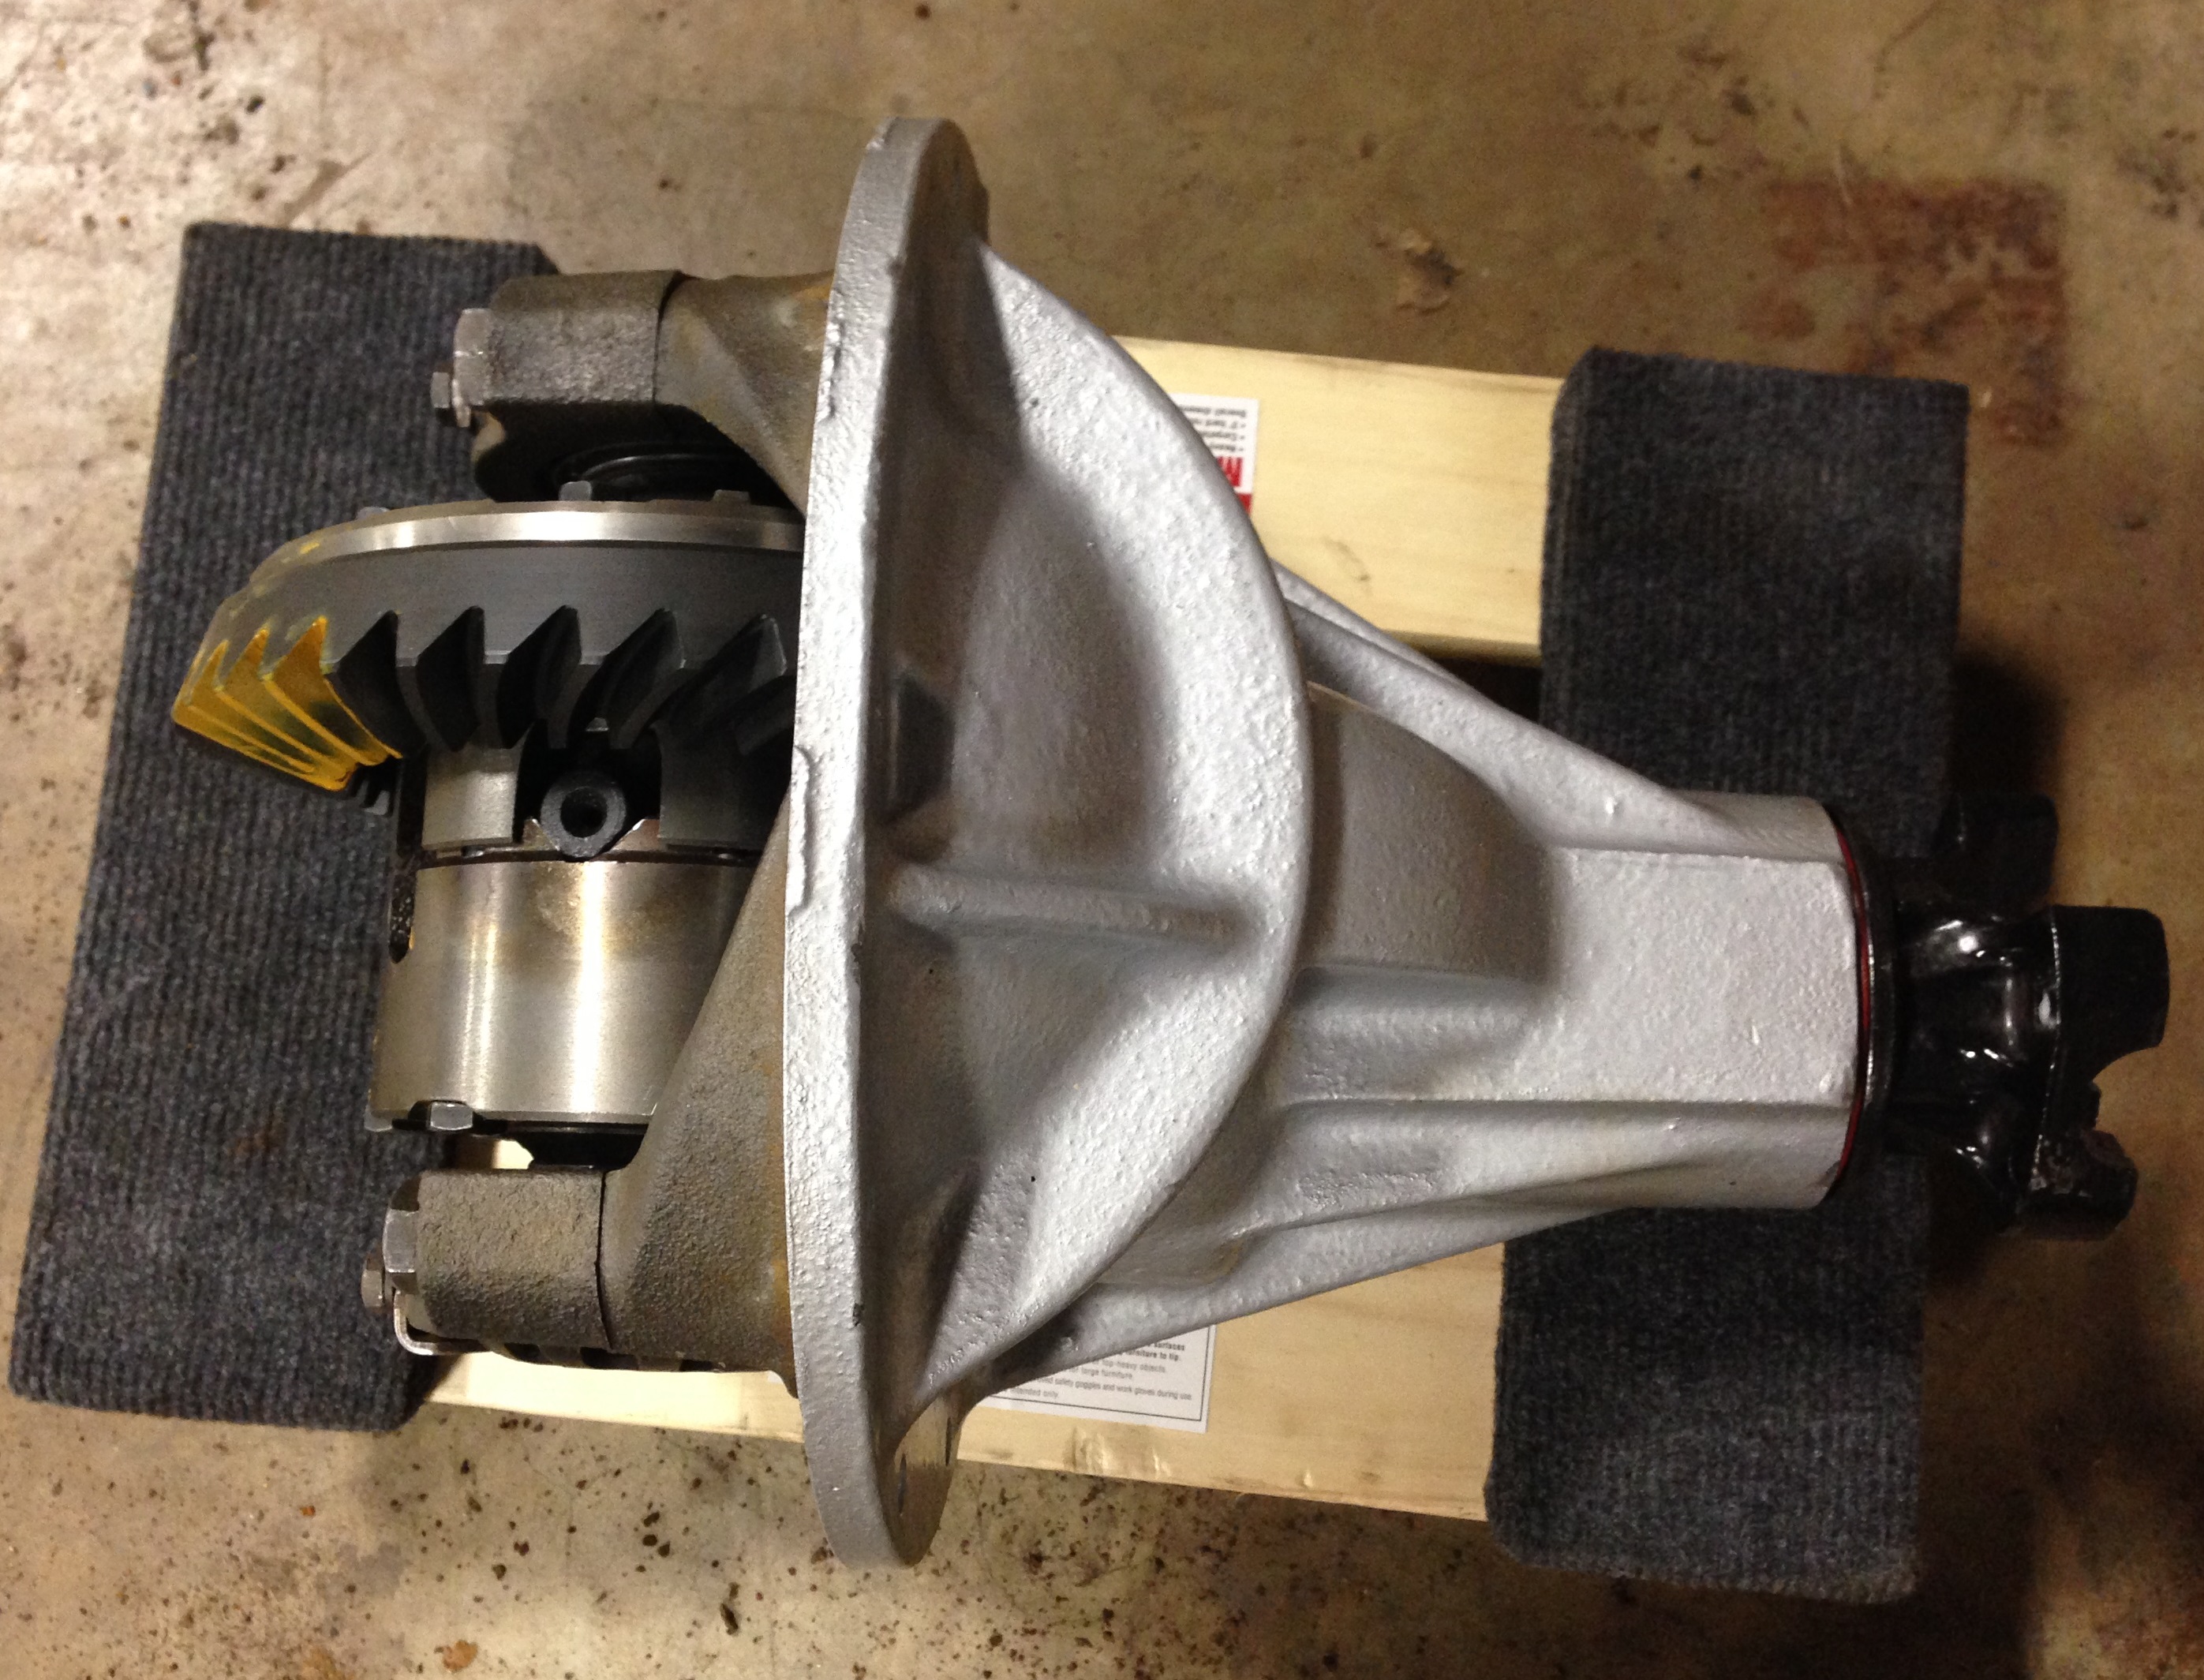
Chunkaliscious
So, then. That’s that. When I get the axle housing back, the new diff and carrier will be bolted up and new axles attached. All of that extra beef should help to transmit 240 additional horses to the ground.